All posts by Ruth Wendel

About Ruth Wendel

I'm a musician, Registered Dietitian, cook, and baker. I love food, and want to share my delight for it with the world. I hope you enjoy my recipes and, if you haven't developed a love for baking already, I hope you will!

Two Treats, One Dough

Hi, all! I’m back with another great recipe. This time, we’re making biscuits, but it’s really better than that. We get two baked treats out of this: flaky, buttery, crispy biscuits, and sweet, soft, cinnamon rolls.

It all starts with a basic dough recipe. Here are the ingredients:

Ingredients:

  • 2 cups flour
  • 4 tsp baking powder
  • 1/2 tsp salt
  • 1/2 tsp cream of tartar
  • 2 tsp sugar
  • 1/2 cup shortening
  • 2/3 cup milk

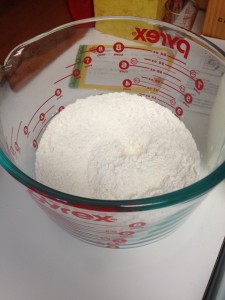
First, mix the dry ingredients together.
IMG_3781

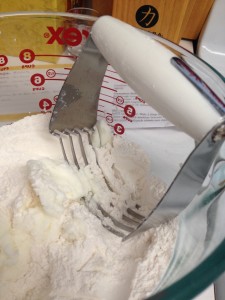
Then, cut in your shortening with a pastry cutter. What is a pastry cutter, you ask? It is a super handy tool that allows you to cut fat, like butter or shortening, into dry ingredients so that you end up with pea-sized bits of fat in your mixture (that’s what we’re going for here).
IMG_3782

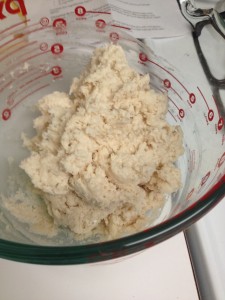
Now, gradually add your milk (I add it in about 3 doses), stirring with a fork after each addition until just mixed. It should look something like this:
IMG_3787

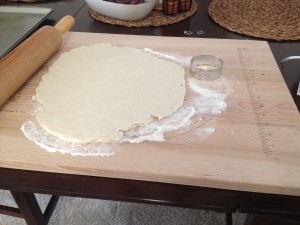
Knead the dough with your hands very briefly, until the dough is mixed. You don’t want to over-knead it, or else you’ll activate the gluten in the flour, which will create a chewy, dense biscuit instead of a flaky, crisp biscuit. When you’ve finished kneading, lightly flour a pastry board and roll out the dough until it’s about 1/2″ thick.
IMG_3789

Using a biscuit cutter (or circular cookie cutter), cut out biscuits and lay them on a baking sheet. Since it was just my husband and I for dinner, I only cut out 6 biscuits and used the rest of the dough to make the cinnamon rolls.

Bake at 450°F for 10-12 minutes or until the biscuits are golden brown.
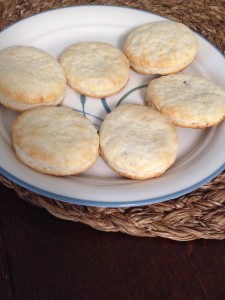
IMG_3793

Since I only made 6 biscuits, I had quite a bit of leftover dough to make cinnamon rolls with! The only additional ingredients you need for these are butter, cinnamon, and granulated sugar. Tip: ADJUST YOUR OVEN TEMPERATURE! The cinnamon rolls require a 400°F oven, not 450°F like the plain biscuits. Nobody likes burnt cinnamon rolls.

To start, re-roll the leftover dough into a rectangular shape (or as close as you can get it).
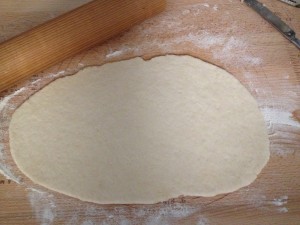
IMG_3790

Next, butter the up-facing side of the dough. This helps the cinnamon and sugar stick. Sprinkle the buttered dough with cinnamon and sugar to taste. You can also put things like nuts or raisins in these rolls.
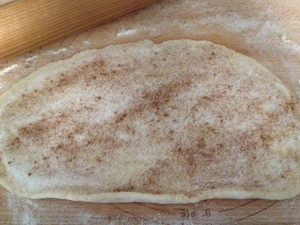
IMG_3791

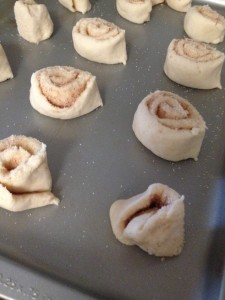
Roll the dough up into a tube, and cut into approximately 1″ slices. Arrange on a baking sheet.
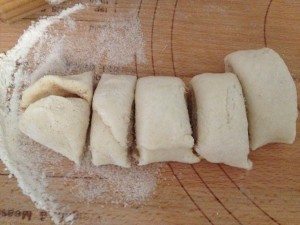
IMG_3792

IMG_3794

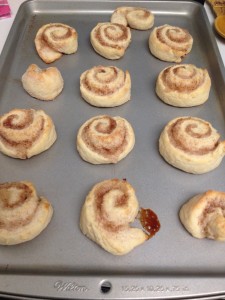
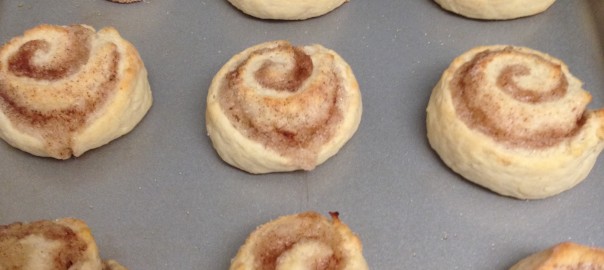
Bake at 400°F for 12-15 minutes.

IMG_3799

And then finally, because we had to have something to go with our biscuits, here is the recipe for crock pot chicken pot pie filling that I made up!

Sauce Ingredients:

  • 1/3 cup margarine
  • 1/3 cup flour
  • 2/3 cup milk
  • 1 1/2 cup chicken broth

Chicken Ingredients:

  • 3 boneless, skinless chicken breasts
  • 1/2 cup chopped onion
  • 1/2 cup chicken broth
  • 2 cups frozen veggies

Arrange chicken, 1/2 cup broth, veggies, and onion in crockpot. Cook on high for four hours until chicken is fully cooked. Using two forks, shred chicken.
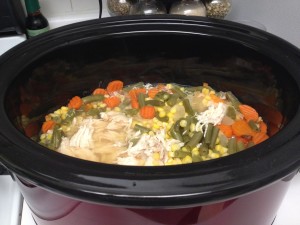
IMG_3795

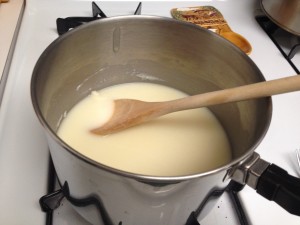
Now, we make the sauce to add to this. Combine the margarine and flour over heat and stir until they form a paste (called a roux). Add the milk, and stir until the sauce is thickened. Finally, add the 1 1/2 chicken broth, and salt and pepper to taste. Stir until fully combined. Pour the sauce into the crockpot and stir.
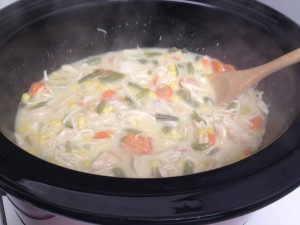
IMG_3798

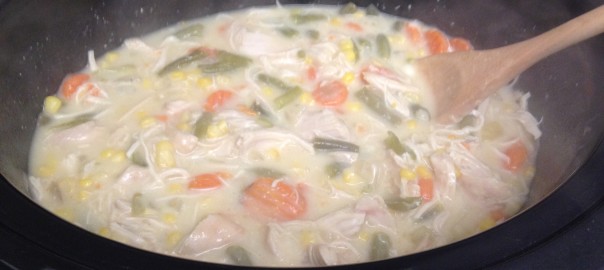
And now, eat your chicken pot pie filling with biscuits on top and be happy. And then have cinnamon rolls for dessert and be even happier! Enjoy!


Homemade Mac ‘n Cheese (Extra Cheesy!)

Hi, all! I’m back with yet another edition of great food (although this time not very healthy)! Today I wanted to share the recipe for my husband’s all-time favorite meal ever… Homemade Baked Mac ‘n Cheese. Before trying this dish, he had only tried the boxed stuff and had long since written off macaroni and cheese as unappealing. Little did he know that a whole world of cheesiness was waiting for him! That is, until my Mom made this recipe for dinner, and he ate it to be polite, and a new love for mac ‘n cheese was awakened. It’s really only fair that you all have the recipe, so that you can share in this mac ‘n cheese goodness. Here’s the recipe:

Ingredients;

  • 1/2 box elbow macaroni (or large elbows)
  • 3 tbsp butter or margarine
  • 3 tbsp all-purpose flour
  • 2 cups milk
  • 1- 8oz block of sharp cheddar cheese
  • Parmesan cheese to taste
  • Italian breadcrumbs to taste

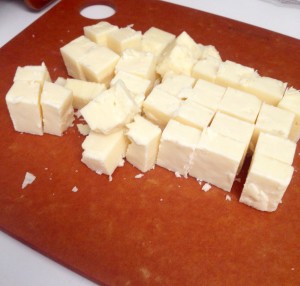
First, cube a whole 8 oz block of cheese. This is the step that takes a couple minutes, and once this recipe gets going you have to be ready to add the cheese right away. I tend to cut the cheese length-wise into quarters, and then width-wise into about 1″ cubes. This makes the cubes small enough to melt quickly.

IMG_3709

Now, bring a medium saucepan of water to boil. Boil the macaroni in the water for 5 minutes. Drain the pasta in a colander and set it aside.

Now starts the part of the recipe that is super simple, but makes you feel like a restaurant quality chef. We’re going to make a basic French white sauce known as a bechamel. It starts with a roux (which is a fancy way of saying cook flour and butter together until they start bubbling and form a starchy paste).

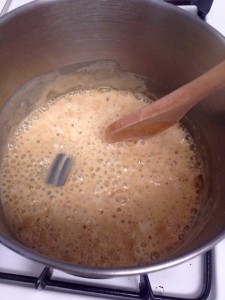
To make the roux, melt the 3 tbsp of butter in a saucepan over medium-high heat (you can use the same one you used for the pasta). Once it’s melted, add the 3 tbsp flour and stir with a wooden spoon or spatula. The flour will eventually dissolve and combine with the flour to form a bubbly paste. For this recipe, you want to have what is known as a “blonde roux”, so you only want it to be golden brown in color before adding the next ingredients.

IMG_3710

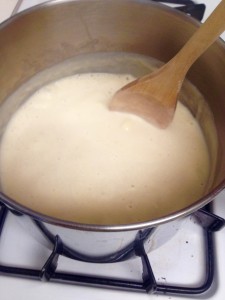
Once you have your roux, add the 2 cups milk and stir continuously. At first, the roux will be clumpy in the milk, but after a few minutes the ingredients will combine and start to thicken into a great white sauce (aka the bechamel). Once it starts to bubble slightly and really thicken, it’s time to add the cheese.

IMG_3713

Add the cubed cheese to the sauce and stir until it melts. After several trials of different cheeses, my husband and I have decided we like either New York Extra-Sharp Cheddar or “Seriously Sharp” cheese by Cabot. I also like to add 1/8 cup Parmesan cheese to this, with some in the sauce and some sprinkled over the top.

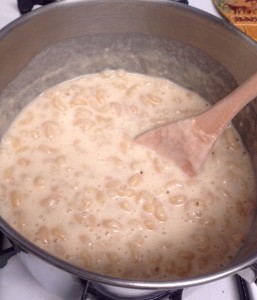
When the cheese is melted, turn off the heat and add the macaroni to the saucepan, stirring until all the macaroni is drenched in sauce.

IMG_3715

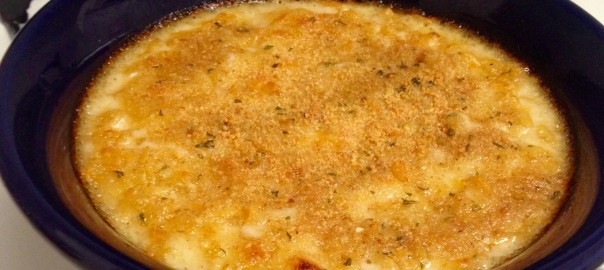
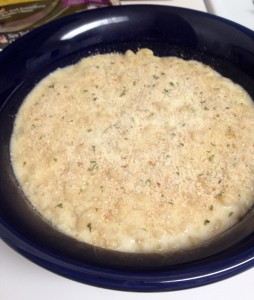
Pour the mixture into a casserole dish (~1 qt or so). Sprinkle the top with Italian breadcrumbs and Parmesan cheese to taste.

IMG_3716

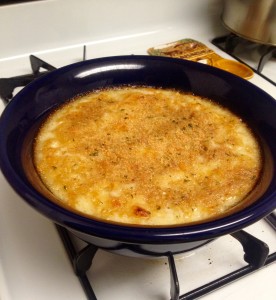
Bake it for 30 minutes at 375°F. Serve it immediately.

IMG_3717

A fair warning: there are rarely leftovers of this dish. My husband can put away an entire casserole dish worth of this stuff, so make sure you get a big spoonful of it before it’s gone! Enjoy!
Super Bowl LI

Hi all! Happy Super Bowl Sunday! I’m sure you’re all preparing your game day snacks and getting ready for the party, just like I am. I’m heading to a party full of Patriots fans, even though my husband and I are rooting against them (please don’t unsubscribe to my blog for that, though!). My job is dessert, so with a little help from my husband and some leftover orange juice, I have a fun and fitting dessert for the party: football-shaped cake. Here’s the recipe:

Cake Ingredients: 

  • 2 cups sugar
  • 1/2 cup butter, softened
  • 1/2 tsp salt
  • 3 eggs
  • 4 cups flour
  • 4 tsp baking powder
  • 2 cups orange juice

Topping:

  • 1/2 cup sugar
  • 1 tsp cinnamon
  • 1/4 cup (1/2 stick) butter

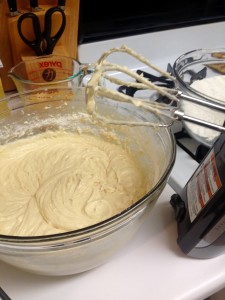
First, preheat the oven to 350°F. Grease and flour an 11×15″ baking pan and set aside. Cream the butter, sugar, salt, and eggs together. Sift the flour and baking powder together into a separate bowl. Then, using a stand mixer or a hand mixer, alternate gradually adding the orange juice and the flour mixture, until the batter is well mixed.

IMG_3650

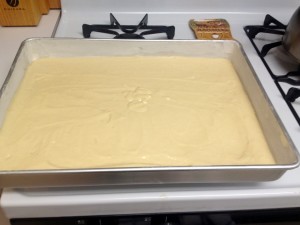
Pour the batter into the greased/floured baking pan.

IMG_3651

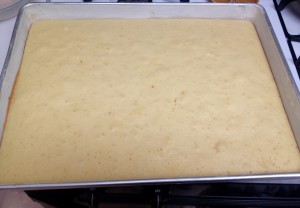
Bake for about 25 minutes, or until a toothpick comes out clean from the center. The cake will be super light when it comes out, so don’t let that fool you into thinking it’s not cooked! While the cake is still baking, combine the cinnamon and sugar for the topping.

IMG_3652

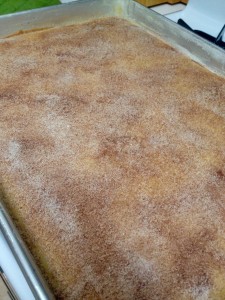
While the cake is still piping hot, rub the 1/4 cup of butter over the top of the cake. The butter will melt and start to soak into the cake, and it makes it really delicious and moist. Then, sprinkle the cinnamon and sugar mixture over the top of the cake evenly.

IMG_3654

Now, let the cake cool completely. This is where the recipe ends, but obviously it’s the Super Bowl, so I had to make it more football-related! I was originally planning to leave this cake in the sheet pan and decorate it to look like a football field, but my husband had the great idea to carve it and decorate it to look like a football (easier since the cake is brown to begin with!). Thus started the intense carving session.

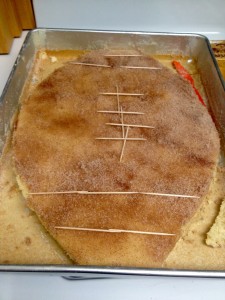
First, we lined toothpicks up on the cake to make the shape of a football and its laces, etc. Then, using a plastic knife with short, sawing motions, I carved the cake to look like a football.

IMG_3655

We had to very carefully lift out the corners of the cake that we weren’t using. Then, using two spatulas each, we transferred the cake to a serving platter. As in football, teamwork makes the dream work.

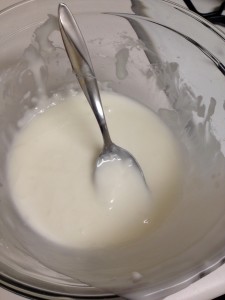
Next, I made a simple powdered sugar glaze that I use on lots of desserts. It’s made with ~1 cup powdered sugar and 2 Tbsp milk. These measurements can be altered to make your glaze thicker or thinner, depending on how much milk you add. In this case, you want to add just enough milk to make all of the sugar dissolve, but you still want the glaze to be fairly stiff so that you can maintain control over it while decorating.

IMG_3657

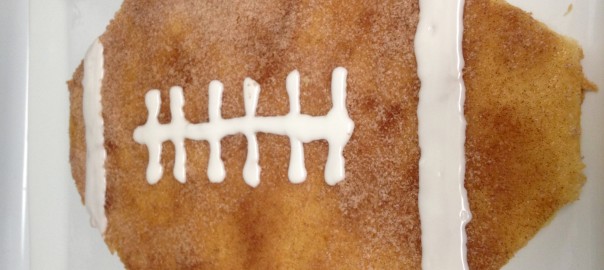
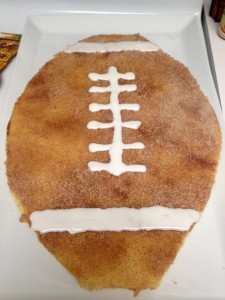
When the glaze is done, you can either pour it into a Ziploc bag with a corner cut off, or use a pastry bag. Then, go to town decorating your football! It’s pretty easy- just draw a straight line in the middle and make some hash marks for the laces, and draw two lines, one across either end of the football. You can mark it out with toothpicks like we did for easier decorating. Your finished product should look something like this:

IMG_3658

And that’s all there is to it! I’m pretty excited for everyone to dig into this. It has a really light orange flavor and the cinnamon and sugar is a nice, light and sweet touch. I hope everyone has a great and safe night enjoying the big game, and here’s hoping for an NFC victory!


Teeny Tiny Cookies

Hi, all! Happy mid-winter! It’s finally time for a new recipe to share. This recipe comes from my friend’s great-grandma. She calls them “refrigerator butter cookies”, but when I first saw these cookies I said “oh, teeny tiny cookies!” so that name stuck. These cookies are versatile and irresistible (I says as I sit next to a bag of them, munching away), and are really easy to make.  Here’s the recipe, from my friend’s Great Grandma Patch:

Ingredients:

  • 1 cup (2 sticks) butter, softened
  • 1 1/2 cup sifted confectioner’s sugar, sifted*
  • 1 egg
  • 1 tsp vanilla
  • 2 1/2 cups all-purpose flour
  • 1 tsp baking soda
  • 1 tsp cream of tartar
  • 1/4 tsp salt
  • Toppings/mixers as desired- I used Sugar in the Raw and chopped chocolate chips, but chopped nuts, sugar syrups, and other fun toppings would work well, too.

*Hint: If you don’t own a sifter, you can put the sugar and the other dry ingredients through a fine mesh strainer.

Cream the butter and sugar together until fluffy. Add unbeaten egg and vanilla, and mix well. Sift the dry ingredients together and blend into creamed mixture. Then, divide the dough into three sections.

Here’s where you can get creative. The recipe calls for us to leave one section plain, to mix one section with chopped walnuts, and one section with chopped chocolate. I stuck with the recipe and used the chocolate chips and only went off the path slightly by sprinkling raw sugar over the plain ones. However, I have absolutely no doubt these cookies would go well with almost any mixer or topping. You could use chopped nuts as a mixer and brown sugar topping to get a pecan roll flavor, finely chopped dried fruit, or even a dollop of jelly over the top after baking.

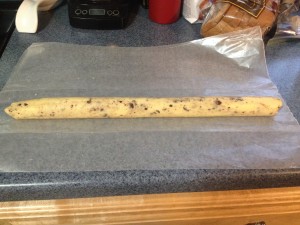
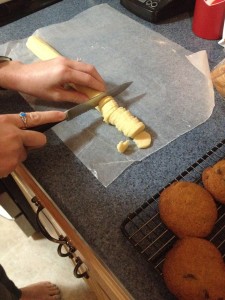
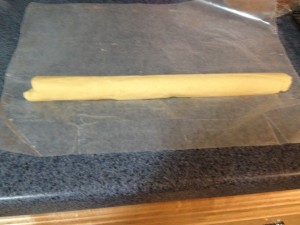
After you’ve mixed whatever ingredients you wanted into your mixes, roll each section into a log, about a half-dollar size across.

IMG_3635IMG_3633

Roll each log up in wax paper, and refrigerate for at least 1 hour. (Hint: You can also freeze the dough; if you’re planning on that, make sure to wrap the dough log in aluminum foil, too.) You definitely want this dough to be cold, because you’ll need to cut it up and cold dough is a lot easier to cut!

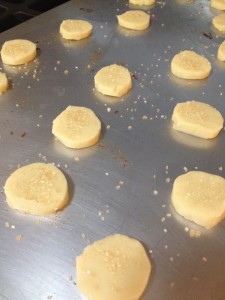
When the dough is nice and cold, cut the logs into 1/4 inch pieces. Place each dough piece on an ungreased cookie sheet. You don’t need to leave a ton of space between them because they don’t spread out much, but it’s still a good idea to leave about an inch between each cookie just in case.

IMG_3637IMG_3642

After you’re done cutting the dough and putting it on a cookie sheet, you can sprinkle toppings on the cookies if you want. As you can see, I sprinkled raw sugar over the top of the plain ones. This would also be a good time to sprinkle brown sugar over the ones with the nuts, or whatever other topping you want.

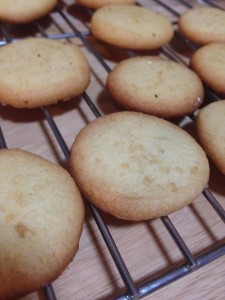
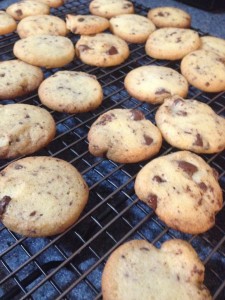
Bake the cookies for ~6 minutes at 400°F. When they’re done, transfer them to a wire cooling rack .

IMG_3643IMG_3644

And that’s it! You now have delicious teeny tiny cookies. I thought it was interesting how the plain and the chocolate chip ones tasted so different, yet they were the exact same base. That’s what makes them fun- one recipe makes a ton of cookies, so you can mix it up with different toppings and mixers, and get totally different cookies, and everyone can have their favorite. Don’t let the amount of cookies that one recipe makes fool you, though… these disappear quickly!

PS- these cookies, especially the plain ones, go really well with tea. My 91-year old aunt was a big fan of her tea with teeny tiny cookies!

I hope you enjoy this recipe and these cookies, as I know I did! Happy baking!


Friendsgiving

Hello, all! Happy Thanksgiving week! We have officially entered holiday season, which is the best time of year to get some baking in, and a time that is full of friends and family. I was lucky enough to herald in the holiday season with a few of my closest friends for our first “Friendsgiving”. We all contributed to the meal, and my job was (of course) the dessert. I made pumpkin pie, but not the traditional way. In my family, we call this recipe “PNG Pumpkin Pie” because it’s the recipe my Mom used when we lived in Papua New Guinea. It’s less sweet and firmer than traditional pumpkin pie, and I much prefer it to regular pumpkin pie. I decided to take it up a notch by roasting my own pumpkin instead of using canned pumpkin. Here’s the recipe:

Pie Filling Ingredients:

  • 15 oz pureed pumpkin (you can use canned pumpkin)
  • 3 eggs, beaten
  • 1 1/2 cup evaporated milk
  • 1 1/2 tsp ground cinnamon
  • 1/2 tsp salt
  • 3/4 cup sugar

Pie Crust Ingredients:

  • 1 1/3 cup all-purpose flour
  • 1/2 tsp salt
  • 1/2 cup shortening
  • 3 Tbsp water

Let’s start with how to roast the pumpkin. Like I mentioned above, it’s not necessary to roast your own pumpkin, but I think it’s a great way to use up your sugar pumpkins that you used for fall decorations!

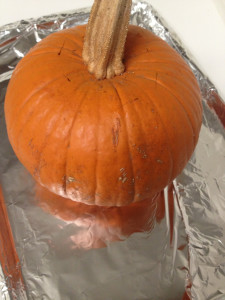
First, preheat the oven to 350ºF. Line a baking sheet with foil, and place your pumpkin (a small sugar pumpkin) on the foil. Pierce the top of the pumpkin around the stem about eight times so that while the pumpkin is roasting, the steam can leave the pumpkin instead of building up and exploding the pumpkin.

image

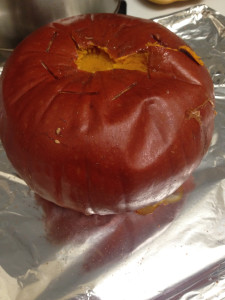
Roast the pumpkin at 350ºF for 2 hours until the pumpkin is brown and slumped. The skin will separate from the flesh of the pumpkin. Let it cool so that you can peel off the skin without burning your fingers.

image

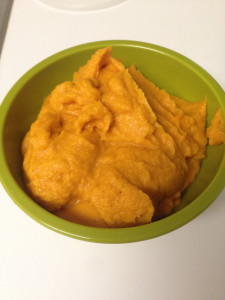
Next, peel off the skin, cut the flesh open, and scoop out the seeds and membranes. Put the flesh of the pumpkin in a food processor and puree it for about 2 minutes, or until it’s smooth. It will look something like this:

image

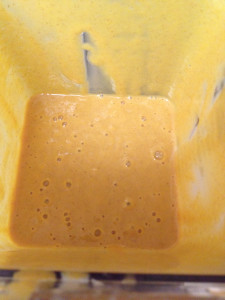
Now that you’ve roasted your pumpkin, it’s time to make the filling for the pie. In a blender, combine your pumpkin puree, evaporated milk, cinnamon, salt, eggs, and sugar. Blend it together until it’s completely mixed. It’ll look like this:

image

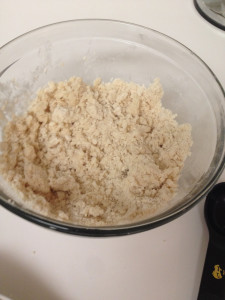
Okay, now set that aside. Now it’s time to make the crust. In a separate bowl, combine the flour and salt. Cut in the shortening until you have pea-sized chunks (or something like that).

image

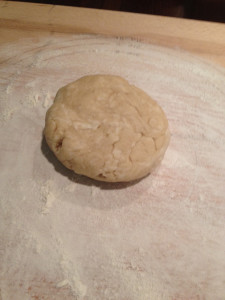
Add the water, one tablespoon at a time. Mix the dough after each addition. By the time you’ve added all the water and have kneaded the dough a bit, it will hold together like this:

image

Now, using a floured surface and a floured rolling pin, roll the dough out until it’s about 10″ across to fit your 9″ pie pan. Here’s a tip: to transfer your pie dough to your pie pan, roll the crust up loosely around your rolling pin and then unroll the crust from the rolling pin over the pie pan. Fold the edges of the crust over and flute them so that you have a pretty edge around your pie pan.

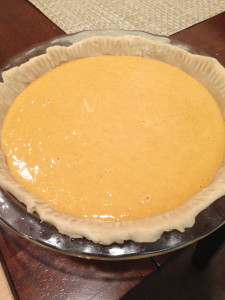
When you have your crust done and in the pie pan, pour the filling into the unbaked crust.

image

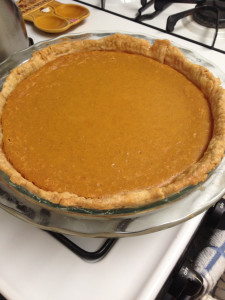
Bake the pie at 350ºF for one hour, or until a knife comes out clean when inserted in the center. When you first take it out of the oven, the filling will be puffed up. As it cools, the filling will deflate a bit (the cooled pie is shown in the picture on the right).

imageimage

And there you have it! Let the pie cool and then dig in!

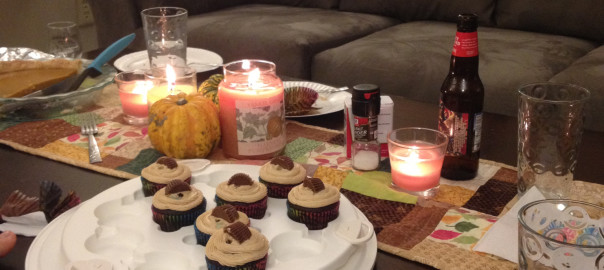
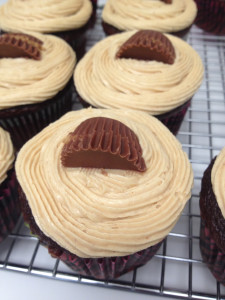
For our Friendsgiving, my friends and I also surprised our men with a birthday party since their birthdays are all close together. I made some chocolate cupcakes with peanut butter frosting- you can find the recipe for the frosting in my post about The Cupcake Bible under PB&J cupcakes.

imageimage

Friendsgiving was so much fun, and definitely a new tradition for us! This holiday season, be thankful, and always make sure to share good food! Happy holidays!

image


A Family Get-Together (With Yummy Food!)

Hi all! It’s been a long time since I’ve posted here, and quite a bit has happened since my last post. I became a Registered Dietitian, began working at a long-term care center, got married, and lots of other things! After all the excitement and change, it’s finally time to get back to posting recipes and sharing food with others. For my first post in a while, I thought it was appropriate to share an old family recipe that I made for a family dinner. The recipe is for stuffed shells, but this is a healthier recipe than traditional ricotta-stuffed shells. It’s made with cottage cheese, which saves quite a few calories (about 300 calories per cup), has  a comparable amount of protein as ricotta, and tastes absolutely delicious! Here’s the recipe:

Ingredients:

  • 1 box giant pasta shells
  • 1/4 tsp salt
  • 1 1/2 lb (24 oz) low-fat cottage cheese
  • 1/4 cup Italian bread crumbs
  • 1/2 cup Parmesan cheese, shredded or powdered
  • 2 Tbsp chopped fresh parsley or 1 Tbsp dry parsley
  • 1 egg, beaten
  • 1 jar of your favorite pasta sauce

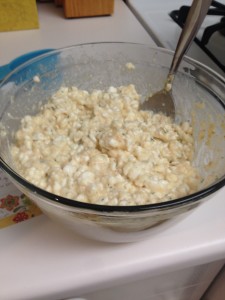
Preheat your oven to 375ºF. Pour 1/2 of the pasta sauce into the bottom of a large casserole dish and set aside. Cook the giant pasta shells according to the instructions on the box and drain the pasta. While the pasta is cooking, mix up the cottage cheese, salt, bread crumbs, Parmesan cheese, parsley, and the egg. It should look like this:

img_3524

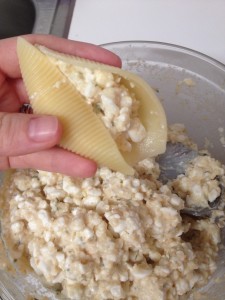
When the pasta is cooked and drained, you can start assembling the shells. Scoop a rounded tablespoon or so into each shell. Basically, scoop enough into the shell to fill it.

img_3525

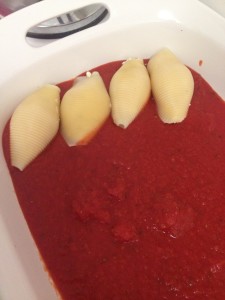
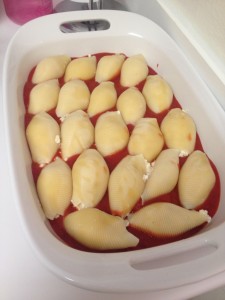
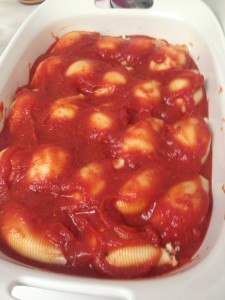
As you fill each shell, lay it seam-side down in the casserole dish like this:

img_3526img_3527

The number of shells that you’ll be able to make varies with the size and shape of your casserole dish, and it’s likely that you’ll have some plain shells left over. Those are actually my favorite part, because as I was growing up my Mom always saved those plain shells for me to eat with Parmesan cheese! We still snack on the plain shells together when we make this recipe.

After you’ve arranged the shells in the casserole dish, pour the other half of the pasta sauce over the top of the shells.

img_3529

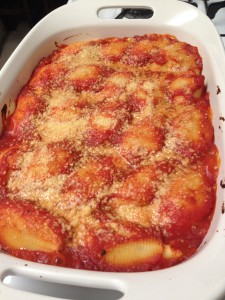
Cover the dish with foil and bake it for 30 minutes. Then, take the dish out of the oven, remove the foil, and sprinkle Parmesan cheese over the top. Return the uncovered dish to the oven and bake it for another 15 minutes. When it’s done, it should look like this:

img_3531

Now, go ahead and dig in! These shells are so good, and your family and friends will love them. When my family came over, there were absolutely no leftovers. It was great! I hope you give these a try and enjoy them as much as my family does! Have a great rest of your week!

Breakfast Burrito Hors d’oeuvres

Hi, friends! Sorry that it’s been a while since my last post. I just started working as a dietetic intern, and it takes up quite a bit of my time! Luckily, as a dietetic intern, I get to focus on food during the day- so this next recipe is actually an invention from work that happens to be delicious and super wicked easy to make!

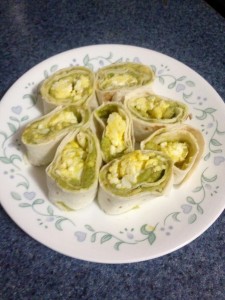
This recipe is for egg and guacamole pinwheels, which are wonderful for breakfast because they’re packed with protein, low in carbs, and contain healthy fats. They’re also great for party platters, and happen to go hand in hand with a great salsa. What could be better???

Ingredients:

  • 1 egg, scrambled
  • 3 tbsp guacamole (I’ll include the recipe for my guacamole at the bottom of this post)
  • 1 soft taco tortilla (you can use a regular white tortilla, or you can use Olé Xtreme Wellness, Joseph’s, or FlatOut brands for higher fiber/protein and lower carb options)

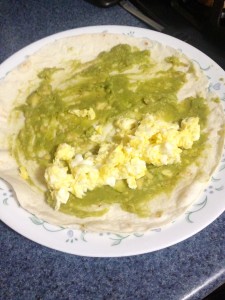
Spread the guacamole in a thin layer over the tortilla. Then, arrange the scrambled egg in a line along the side of the tortilla.

IMG_2710

Roll the edge of the tortilla nearest the egg up and over the egg, and then continue rolling. This will ensure that the egg is in the center of the wrap, and that the guacamole holds the tortilla roll together (kind of like sushi- you have your protein in the middle, and then the stuff on the outside holds it all together).

IMG_2711

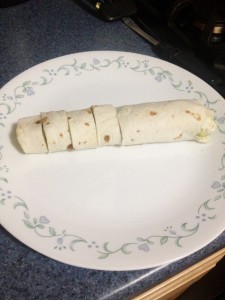
Gently cut the roll into 1-inch pieces using a serrated knife. You can either eat them now, or arrange the pieces on a plate with some salsa and serve them at a party!

IMG_2712

IMG_2716

And there you have it! Super easy and absolutely delicious! Now, for those who want to make their own guacamole and don’t have a great recipe…

Ruth’s Guacamole:

  • 1 avocado, mashed
  • 1 tsp lime juice
  • Garlic salt to taste
  • Chili powder to taste
  • Cracked black pepper to taste

Mix all of the ingredients together, and you have a great guacamole! Happy cooking!

Not Your Average Hashbrowns

Hello, friends! Happy Monday! I’ve been visiting my fiancé in Oklahoma this week, and decided to treat him to a special dinner with his grandparents. I have a fantastic recipe to share today from that dinner, given to me by his mother- Potato Casserole! Perhaps not the most glamorous name, but there you have it. I’ll tell you now, this recipe isn’t low-fat, low-sodium, or really low-anything. However! It is high-delicious, high-crowd-pleaser, and high-easy-to-make.

Ingredients:

  • 2 lb. frozen hashbrowns, thawed
  • 1 stick melted butter or margarine
  • 1 cup cream of chicken soup (you can use low-sodium)
  • 8 oz sour cream (you can use low-fat)
  • 1/2 cup chopped yellow onion
  • 2 cups shredded sharp cheddar cheese
  • 1 tsp salt (I didn’t put this in)
  • 1 tsp pepper (I didn’t put this in either)
  • 2 cups crushed corn flakes
  • 1/2 stick melted butter or margarine

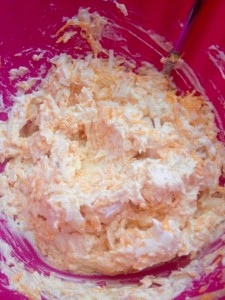
Preheat the oven to 350ºF. Combine all but the last two ingredients in a large mixing bowl. IMG_2594

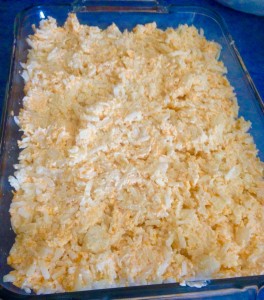
Spoon the mixture into a large glass casserole dish. The one I used was pretty huge, like 15″x10″. If you have a 9×13″, that will definitely work- you just may have to cook it for a few minutes longer!

IMG_2595

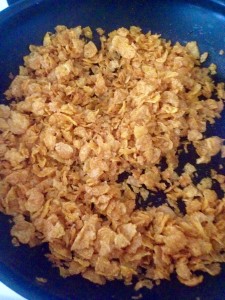
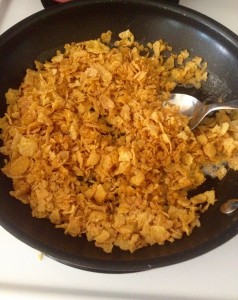
Sauté the corn flakes in the 1/4 cup butter, just until they’re darker brown but still crunchy.

IMG_2597IMG_2596

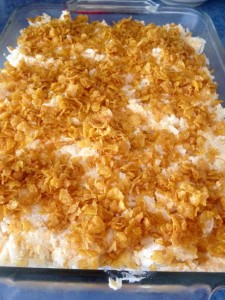
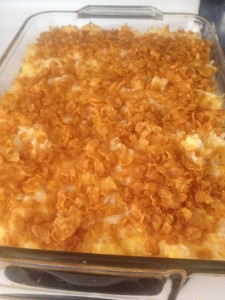
Sprinkle the corn flakes over the top of the casserole so that it’s evenly coated.

IMG_2598

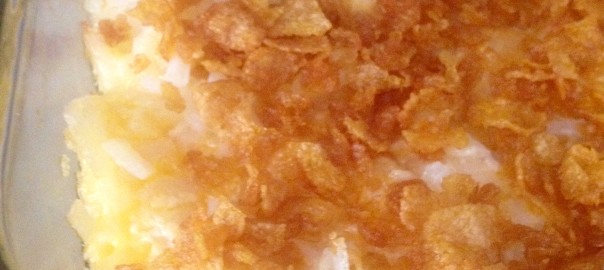
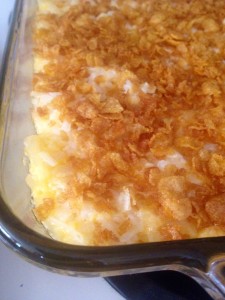
Bake the casserole, covered with aluminum foil, for 40 minutes to 1 hour. I baked mine for 45 minutes and it was absolutely perfect. I’m talking bubbly cheese, crunchy topping, creamy potatoes… it seriously doesn’t get better than that. I have a picture of a yummy cheesy corner of the casserole, just so you can get an idea for how good this looks.

IMG_2600IMG_2599

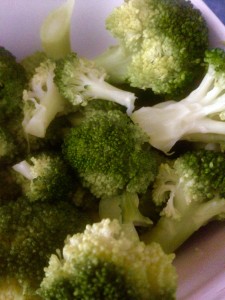
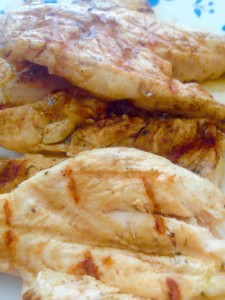
And there you have it! I served this with marinated chicken breast (olive oil, salt, pepper, minced garlic, chopped onion, lemon juice, cilantro- put it all in a Ziploc bag with the chicken and leave it in the fridge for about 2 hours, then grill it), steamed broccoli, and crescent rolls. We had quite the spread!

IMG_2604 IMG_2602 IMG_2601 IMG_2599

We were quite full afterwards, and were also quite happy. I hope you enjoy this fantastic recipe, and give it a try! Happy cooking!


Campfire Cupcakes

Hi friends! Happy 4th of July weekend! I was flipping through my Cupcake Bible this past week and came across a great recipe for S’mores Cupcakes. Since my last S’mores Dip recipe was so popular, I decided to go round two for the s’mores! This recipe is really simple and cute, and was a huge favorite among my family and my dad’s coworkers. Here’s the recipe:

Ingredients:

  • 1 and 1/4 cups all-purpose flour
  • 1/2 cup unsweetened cocoa powder
  • 3/4 tsp baking soda
  • 1/2 tsp salt
  • 1 stick softened butter or margarine
  • 1 and 1/4 cups granulated sugar
  • 2 eggs
  • 1 cup milk
  • 1 tsp vanilla
  • 7 whole graham crackers (14 squares)
  • 1 and 1/2 cup marshmallow fluff
  • Chocolate candies of your choosing (I chose Kit-Kats, but Hershey milk chocolate bars are more traditional. You’ll need as much as you want to top each cupcake.)

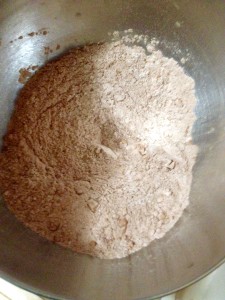
Preheat the oven to 350ºF, and line 14 cupcake cups with the paper baking cups. Combine the flour, cocoa, baking soda, and salt in a mixing bowl, and set it aside.

IMG_2566

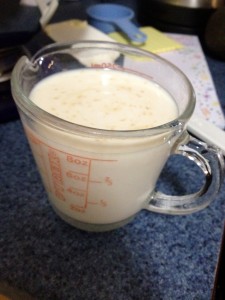
Combine the milk and vanilla, and set those aside.

IMG_2567

Beat the butter in a large bowl with a stand mixer at medium speed until the butter is creamed. Add the sugar, and beat for three minutes. Add the eggs one at a time, beating well after each addition. Now, put the mixer to medium speed and add the milk mixture and flour mixture alternately, starting and ending with the flour mix.

Pour the batter into the cupcake cups, so that they’re about 3/4 full. I got 14 out of the mix, but you may get more or less. According to the book, I was only supposed to get 12. It happens!

IMG_2570

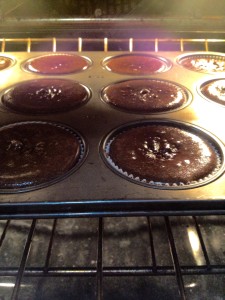
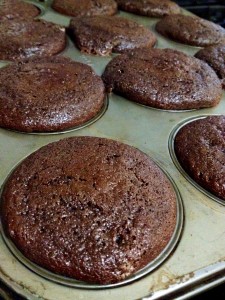
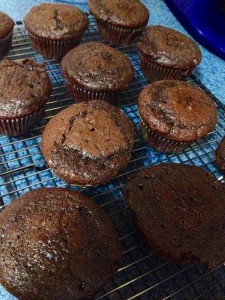
Bake the cupcakes for about 20 minutes, or until a toothpick inserted in the middle of a cupcake comes out clean. Cool them in the pan for 10 minutes, and then take them out and finish cooling them on a cooling rack.

IMG_2571IMG_2572

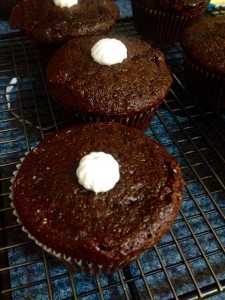
When the cupcakes are completely cooled, put a small dollop of fluff on the top of each one. This will act as the glue for the graham crackers.

IMG_2573

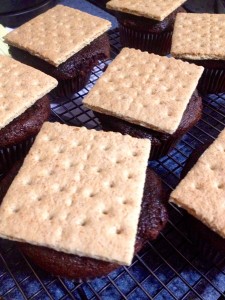
Now, break each graham cracker in half so that you have about 14 squares. Put one square on each cupcake.

IMG_2574

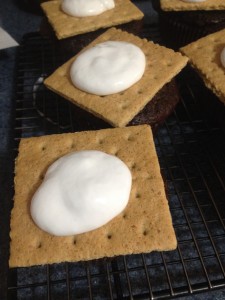
Now, put a larger dollop of fluff on each graham cracker.

IMG_2575

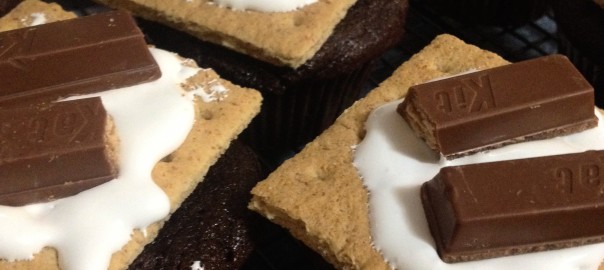
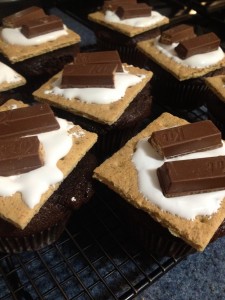
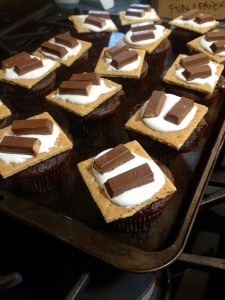
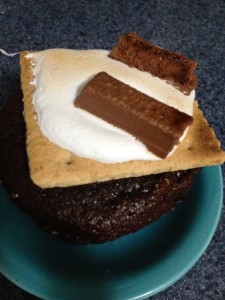
And now, put the candy on top of the fluff like you would on a s’more!

IMG_2576

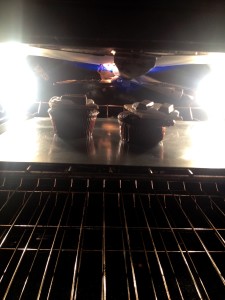
You can either eat the cupcakes like this, or take it up a notch by toasting the fluff. If you want to do that, put all the cupcakes on a baking sheet. Put them in the freezer for about 15 minutes (this prevents the cupcakes from cooking more when they’re under the broiler). When they come out of the freezer, broil them on high heat just until the fluff gets toasted. The chocolate may melt and the cracker may toast- added bonuses!

IMG_2577 IMG_2578 IMG_2579

These cupcakes are seriously so good. I hope you’ll give them a try for your 4th of July party! Have fun on the 4th, and happy baking!

S’mores Dip… Yeah, I Said It

Hi friends! I hope you’re all having a stellar June, and congratulations to all the high school graduates! Today, the recipe is a remake of a favorite summer dessert- s’mores! I’ve been seeing this recipe pop up all over Facebook, and I knew I had to give it a try and share it with my non-Facebook readers. This is seriously one of the simplest recipes you’ll find. Let’s dig in!

Ingredients:

  • 10 oz bag of marshmallows (the medium/large marshmallows work well)
  • 1 cup semi-sweet chocolate chips
  • 3 bars Hershey milk chocolate
  • Any other chocolate you have on hand and want to use
  • 1 package Graham crackers

A note about the chocolate- it really doesn’t matter what type you use. I used a mixture of three different chocolates (Hershey milk chocolate, Hershey Bliss milk chocolate, and semisweet chips), and it was delicious because the flavors mixed into a really yummy deep chocolate. If you only have chocolate chips on hand, that will work well too! This is a flexible recipe.

Pour the chocolate into the bottom of an aluminum pie dish, or another pie dish that you may have on hand. Arrange the chocolate into a single layer so that it evenly melts.

IMG_2534

Arrange the marshmallows in concentric circles on top of the chocolate.

IMG_2535

Now, put the dish in the oven to broil. I used a low broil setting to simulate slow toasting over a fire! After the marshmallows are toasted nicely, turn the oven onto 350°F and leave the dish in just until the chocolate is melt-y. You’ll be able to see if it’s melted through the marshmallows, so no worries about that! When you’re satisfied with the condition of your chocolate and marshmallows, take it out of the oven and… voilà!

IMG_2537

Use your Graham crackers (or a spoon, whatever!) to scoop the yummy dip, and enjoy! This serves a ton of people, so this is a great dish for a summer party! Just a note, this dip also keeps well for a few days. The chocolate does re-harden, but you can melt it again or just eat it with hardened chocolate. I did both, and it was delicious! I hope you give this summer fun recipe a try. Happy baking!