All posts by Ruth Wendel

About Ruth Wendel

I'm a musician, Registered Dietitian, cook, and baker. I love food, and want to share my delight for it with the world. I hope you enjoy my recipes and, if you haven't developed a love for baking already, I hope you will!

The Cupcake Bible

Hello, all you fantastic bakers out there! Sorry I haven’t posted in a few weeks, but college classes have unfortunately been in full swing. Not to worry, because I’ve been baking away in my spare time! This post will be a shout-out to my brother because he gave me brand new cupcake equipment, as well as a review of a cupcake cookbook that my boyfriend gave me for my birthday, called The Cupcake Bible. It has over 150 recipes in it, but I’ll only take you through three of their recipes (with my adaptations included). Here we go!

Peanut Butter and Jelly Cupcakes

This recipe is super simple and so fun! Not to mention the cupcakes are absolutely delicious. I don’t like PB&J sandwiches, but I went out on a limb and made these cupcakes, and loved them. It’s the perfect combination of sweet cake, tangy jelly, and creamy, nutty frosting.

Ingredients:

  • 1 package yellow cake mix (plus ingredients to prepare the mix)
  • ~ 2 cups strawberry jelly
  • 3/4 cup creamy peanut butter
  • 1 stick softened butter or margarine
  • 2 cups powdered sugar (aka confectioner’s sugar)
  • 1/2 tsp vanilla
  • 1/4 low-fat milk

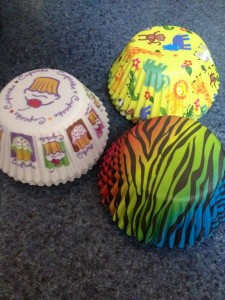
Preheat the oven to 350ºF, and line 24 cupcake/muffin cups with cupcake papers. Speaking of which, check out these adorable new cupcake papers my brother got me! What a guy!

IMG_1720

Make the cake mix as instructed on the box, and then spoon the batter into the cupcake papers, filling them about 2/3 full. (Hint: use a ladle to get all the papers filled about the same.) Bake according to the directions on the box, or until a toothpick inserted in the middle comes out clean. Cool the cupcakes in the pan for 5 minutes, and then transfer them to a cooling rack until they’re completely cool.

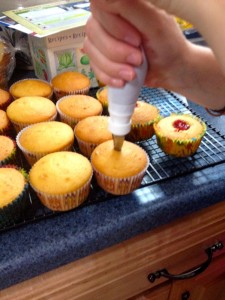
Here’s the awesome part: filling the cupcakes with jelly! You can do this two ways. If you have a pastry bag set (like I now do, because my brother rocks!), go ahead and fill a pastry bag with the strawberry jelly and attach a small circular tip. If you don’t, no worries! Cut a small hole in the center of the cupcake either using a knife, or a nifty cupcake corer- like the one my brother got me!

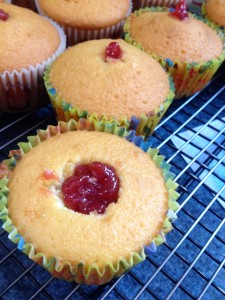
If you cut holes in the center of the cupcakes, spoon a little jelly into the holes. If you’re using a pastry bag, insert the tip into the center of the cupcake and squeeze out jelly until the jelly just starts coming out the top of the cupcake.  It should look like this:

IMG_1813 IMG_1815

If you cored your cupcake, it should look like this:

IMG_1816

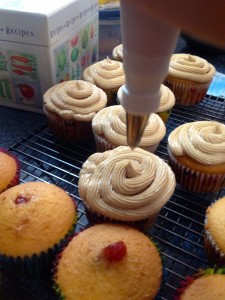
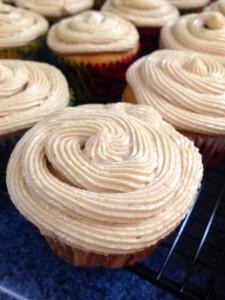
Now on to frosting! Beat the peanut butter and margarine together with a hand held mixer for 2 minutes on medium speed. Add the powdered sugar and vanilla, and mix on low speed for 1 minute. At this point, it’ll be really thick. Then, gradually add the milk and mix the frosting until it’s really smooth and creamy. To frost, you can either use a knife and spread the frosting onto the cupcakes, or use a pastry bag and pipe the frosting on. Since I wanted to play with my new pastry bags, I piped my frosting. Here’s the final product!

IMG_1821 IMG_1822

IMG_1824

I’m telling you, that’s the perfect cupcake. Peanut butter and jelly really is a match made in Heaven. So, this recipe is a total winner. On to the next one!

Taffy Apple Cupcakes (renamed by me to Caramel Apple Cupcakes)

These mini cupcakes are the perfect little bite: the warm spiced applesauce cake, with a smooth and smoky caramel, rolled in just the right amount of toffee crunch. This was a huge hit with my roommates, and I know it will be for you!

Ingredients:

  • 1 & 3/4 cups all-purpose flour
  • 1 tsp baking soda
  • 1 tsp ground cinnamon
  • 1/2 tsp salt
  • 1 cup unsweetened applesauce
  • 3/4 cup granulated sugar
  • 1/2 vegetable oil
  • 1 egg
  • 1 package caramels (~14 oz)
  • 3 tbsp low-fat milk
  • 30 wooden craft sticks
  • 1 bag toffee bits (optional- you can use whatever topping you prefer, or none at all)

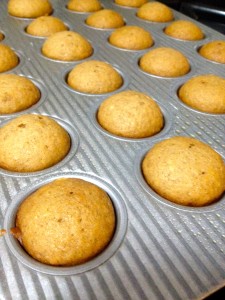
Preheat the oven to 350ºF, and spray 30 mini muffin cups with nonstick cooking spray. Combine the applesauce, sugar, oil, and egg in a large bowl. Add the flour, baking soda, cinnamon, and salt, and mix well until thoroughly combined. Fill the cups about 3/4 full. (Tip: These mini muffin cups are a lot smaller than you might think- I overflowed my first few, so go easy at first.) Bake 15 minutes, or until a toothpick comes out clean. Cool in the pans for 5 minutes, and then transfer them to a cooling rack to cool completely.

IMG_1781

Line a baking sheet with wax paper, and spray the paper with nonstick cooking spray. Also, pour your toffee bits out onto a plate. Then, insert the craft sticks into the tops of the cupcakes. Make sure it’s the tops of the cupcakes, because otherwise the cupcakes won’t be able to stand up. Next, put the package of caramels with the milk in a large, microwave-safe bowl and put them in the microwave for 2-3 minutes on high, stirring each minute. They might bubble up pretty high, but that’s totally normal! It’ll go down when it comes out of the microwave. Here comes the fun part!

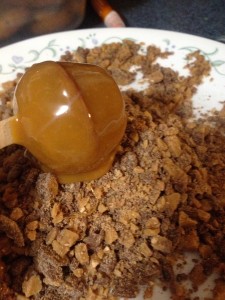
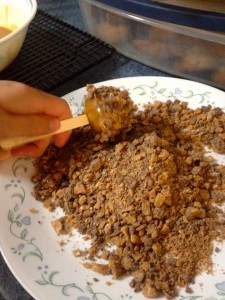
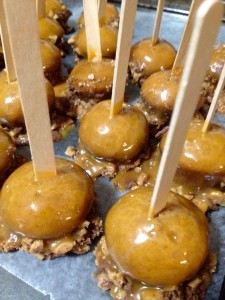
Dip each cupcake into the melted caramel sauce, rolling the cupcake around to fully cover it. Quickly, roll the cupcake in the toffee bits and set it, stick up, on the baking sheet.

IMG_1797 IMG_1791 IMG_1798

Just a heads-up, the toffee does tend to slide down the cake and pool at the bottom. Although the toffee was yummy with the cupcakes, I wouldn’t use it again. I would go without a topping, because the caramel soaks into the cake and makes it perfectly moist and delicious on its own, and I thought the toffee just got in the way of the caramel. However, if you want to use it, go right ahead!

This recipe was fantastic! The size of the cupcakes is great, because they’re just a little bite for when you get a sweets craving, instead of having to commit to a large cupcake. The cake recipe on its own is also perfect for an applesauce cake! I made mini applesauce cake muffins with this recipe, and ate them as snacks and breakfasts. Delicious!

And last but not least…

Filled Rich Chocolate Cupcakes (Chocolate Cheesecake Cupcakes)

Ingredients:

  • 3 cups all-purpose flour
  • 2 cups sugar
  • 2/3 cup cocoa powder
  • 2 tsp baking soda
  • 1 tsp salt
  • 2 cups water
  • 2/3 cup vegetable oil
  • 2 tbsp white vinegar
  • 2 tsp vanilla extract

Filling:

  • 8 oz cream cheese, softened
  • 1/3 cup granulated sugar
  • 1 egg
  • 1/8 tsp salt
  • 1 cup semi-sweet mini chips (I used more, and no one was complaining!)

A note about the vinegar, before any questions arise: this is the coolest recipe ever, because the cake part has no eggs! It uses a reaction between the baking soda and the vinegar to foam the cake and make it lighter, so no eggs are needed! I promise you can’t taste the vinegar.

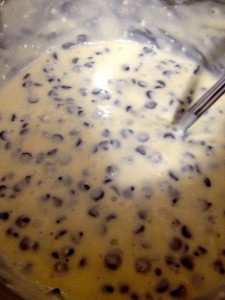
Preheat oven to 350ºF, and line 24 cupcake cups with cupcake papers. Prepare the filling by beating the cream cheese, sugar, egg, and salt in a small bowl with a hand held mixer. Then, stir in the chocolate chips.

IMG_1762

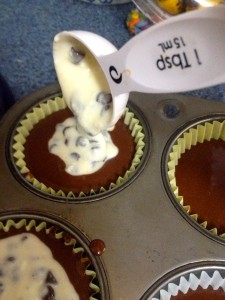
Stir the flour, sugar, cocoa, baking soda, and salt in a mixing bowl. Add the water, oil, vinegar, and vanilla, and beat the mixture on medium speed for 3 minutes. Fill the cupcake papers 2/3 full with the batter. Then, spoon about 3/4 tbsp of the filling into the center of each cupcake.

IMG_1767 IMG_1768

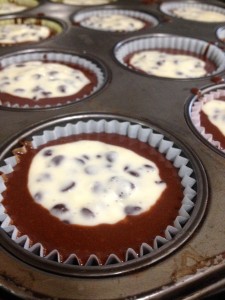
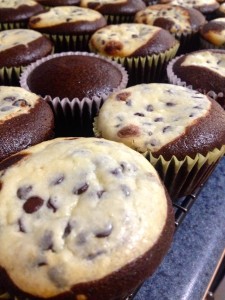
Bake the cupcakes for 20-25 minutes, or until a toothpick inserted in the middle comes out clean. Transfer the cupcakes to a cooling rack, and cool completely.

IMG_1774

This is where the official recipe ends, but really, what’s a cupcake without some sort of frosting?? So, I made a chocolate glaze to go on top. Here’s the recipe:

Ingredients:

  • 1 cup chocolate chips
  • 3 tbsp butter
  • 1 tbsp corn syrup
  • 1/4 tsp vanilla

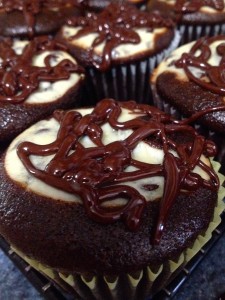
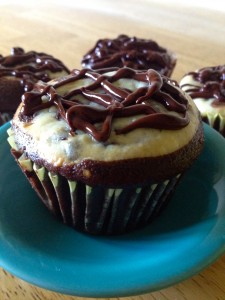
Melt all these ingredients together and stir well, and then drizzle the glaze over the cupcakes. It really gave the cakes a finishing touch, and added another dimension of chocolate heaven.

IMG_1775 IMG_1777

This recipe was a huge hit! I took the cupcakes to a family party, and they were well-loved by all. Even my dog kept barking at the cupcakes because he wanted to try them so badly.

IMG_1802 IMG_1803

I hope you’ve enjoyed reading this post as much as I’ve enjoyed writing it, and I hope you’ll try these recipes, and maybe even buy The Cupcake Bible. I will use this cookbook for years, and can’t wait to try all of its recipes! Happy baking!


A Taste of Rome

Hello friends! I hope your last few weeks of summer (sorry to remind you!) are going well! All of my friends are going back to school now, but luckily, one of my friends is still here! We took advantage of our extra time at home to bake some delicious desserts- from authentic Italian recipes! My friend spent a semester abroad in Rome, and came home with a cookbook created by her Italian program director. This cookbook is definitely one of a kind, because the translation to English is a bit rough- some of the recipes call for a “knob” of butter, and others don’t tell you what temperature or time to cook the dish for. We decided to just go for it and see what happened, and the results were divine, to say the least.

Our creation didn’t have an official name from the cookbook, so we’ll call it a Raspberry Jam Tart. We also made a Peach Cinnamon Tart, but I’ll get to that later! Here’s how to make it.

Ingredients/Materials:

  • 2 eggs
  • 2 cups flour
  • 1/3 cup softened margarine
  • 3/4 cup granulated sugar
  • 1 tsp. baking powder
  • 1/2 cup jam of any flavor (we used raspberry to start)
  • 10″ pie plate, buttered and floured

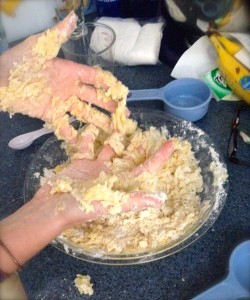
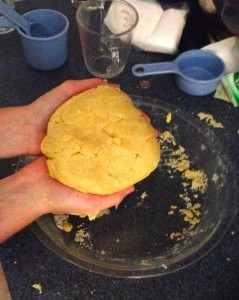
In a pie plate or on a large flat surface, pour the flour out and make a well in the middle of it. Put the eggs, margarine, sugar, and baking powder into the well. It might spill out a bit, but that’s just fine! Mix those ingredients with your hands, kneading the mixture into a dough. It may get a little messy, but that’s all part of the fun!

IMG_1645


IMG_1646


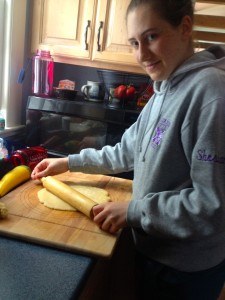
When the dough has formed, take 1/3 of the dough and set it aside. Roll out the other 2/3 to 1/8″ thickness, and until it fits in a 10″ pie plate. (Tip: to get the rolled dough into your pie plate without it breaking, roll it up over your rolling pin and then unroll it into the pie pan.)

IMG_1647 IMG_1648


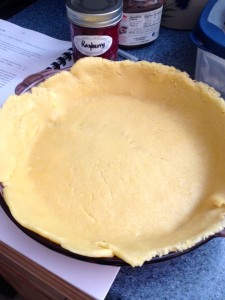
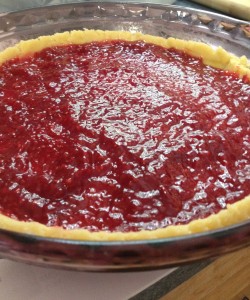
Next, spoon the jam into the bottom of the tart dough, just until it covers the bottom of the pie plate. We had the privilege of using my mom’s homemade raspberry jam (and later her homemade peach cinnamon jam), but any other jam will work just as well. Cut the excess dough from the sides, so that there’s a very small edge of dough above the jam. This excess dough can be put with the other 1/3 of the dough that you set aside.

IMG_1649


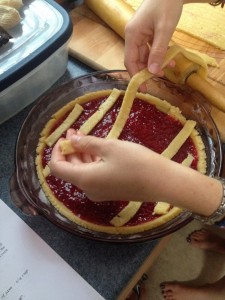
Roll out the other 1/3 of the dough and cut it into 1/4″ strips. Lay some of them horizontally along the pie plate, and some of them vertically, so that you have a lattice design on the tart. (Hint: we didn’t bother doing the fancy weaving for a real lattice, but it looks exactly the same when it comes out of the oven!)

IMG_1650 IMG_1653


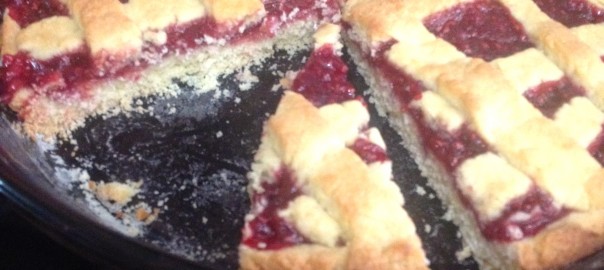
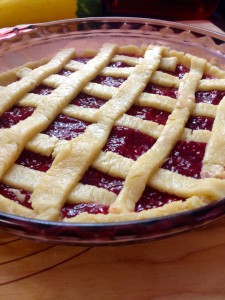
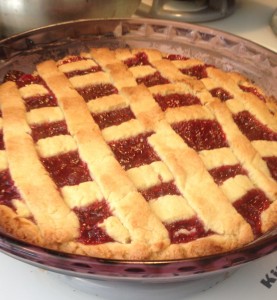
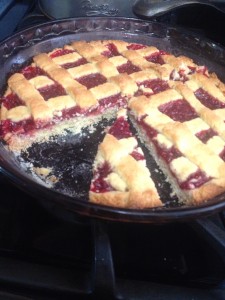
Put the tart in the oven at 400ºF for 23 minutes, or until the crust is golden brown. I know 23 minutes is a strange amount of time, but trust me on this one. When it comes out of the oven, let it cool a bit and then dig in! This tart is absolutely gorgeous, and just as yummy as it looks!

IMG_1659


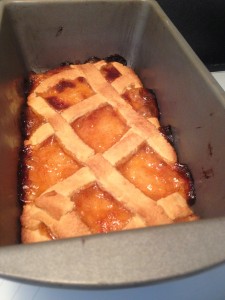
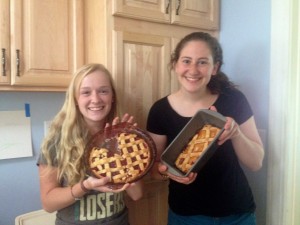
My friend and I had leftover dough, so we made a Cinnamon Peach Tart. It’s the exact same method, except we used a buttered 9×5″ baking pan and my mom’s peach cinnamon jam. It honestly tasted like a heavenly peach cobbler.

IMG_1660


It was such a pleasure to bake with my friend, and to try my hand at some amazing Italian desserts! Believe me, the tarts are already eaten, and we’ll be baking plenty more desserts before school starts again. I hope you love this recipe as much as I did, and as the Italians would say, Ciao!

IMG_1662 IMG_1664


The Grammy Cake

I’m back! I’ve been a tad busy recently, because my boyfriend left for college today and I wanted to spend some extra time with him. However, now that he’s gone, I’m back at the baking and ready to share my latest!

Here’s the story of my newest creation: I was feeling sad because my boyfriend was leaving, and his Grammy messaged me and suggested that I bake a “comfort food” cake to help me feel better. For me, that says ‘peanut butter and nutella sandwiches’. I decided to try her idea and see how it turned out, and if it was delicious, I’d call it the Grammy Cake! Now stick with me, here. No, I didn’t actually make a sandwich. What I did make was a moist, delicious, chocolate peanut butter cake with Nutella peanut butter frosting. If you’ve never tried peanut butter and Nutella, don’t knock it until you’ve tried it! Even my dad loved this cake, and he likes neither cake nor Nutella!

Here’s how you make it:

Ingredients/Equipment:

  • 1 chocolate cake mix (any brand should work, but I used Betty Crocker)
  • 1/2 cup & 2 tbsp creamy peanut butter
  • 1/2 jar Nutella (or chocolate hazelnut spread of any kind)
  • A hand mixer and an 9×13″ baking pan

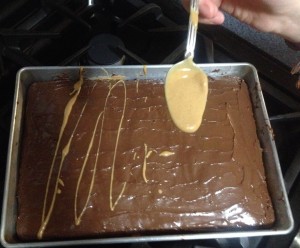
First, mix up the cake mix according to the directions on the box, and pour the batter into the baking pan. Then, put the 1/2 cup peanut butter into microwave for 30 seconds. It sounds unusual to heat it up, but from my experience of toasted peanut butter and Nutella sandwiches, I knew that the peanut butter gets warm and melty and delicious! Drizzle the melted peanut butter over the chocolate batter until the cake is mostly covered in peanut butter.

IMG_1607


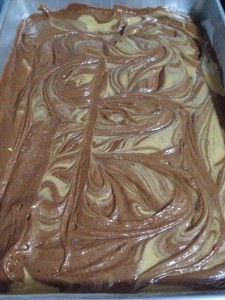
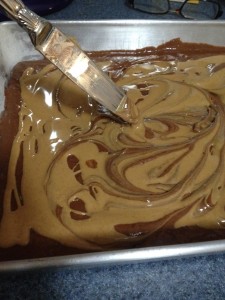
Then, using a knife or toothpick, swirl the melted peanut butter into the chocolate batter.

IMG_1608 IMG_1609


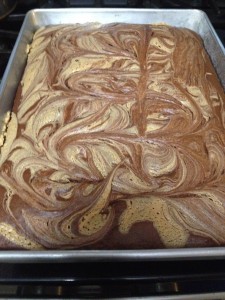
Bake the cake according to the directions for a 9×13″ pan on the cake mix box, until a toothpick inserted in the middle comes out clean. It’s super cool- it stays all swirly after it’s cooked!

IMG_1610


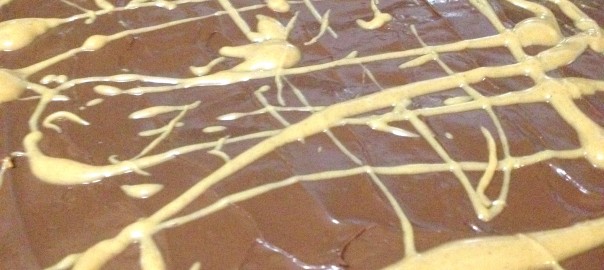
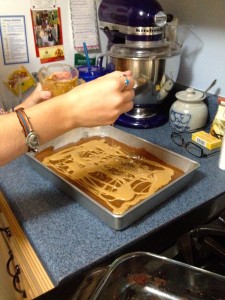
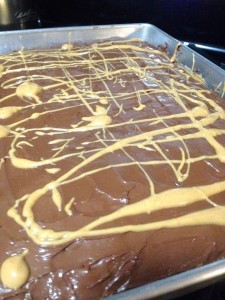
Let the cake cool completely before even thinking about frosting it, or else you’ll end up with melted frosting! When you’re positive the cake is cool and the bottom of the pan is cool, break out the Nutella. You can spread it on as thick or thin as you like! I did a fairly thin layer, because I wanted to save my Nutella for toast. After you frost the cake with Nutella, melt the other 2 tbsp of peanut butter and drizzle it over the top.

IMG_1611


When you’re all done, it should look like this (or at least something like this):

IMG_1616


This cake was for my boyfriend’s going-away party at his work, and it was gone in no time! The Grammy Cake got raving reviews, and my hat comes off to Grammy for such a brilliant idea. I hope you enjoy this cake as much as my family and friends did, and that the end of your summer is wonderful. For everyone going back to school, good luck and study hard!

Sweet Tea and Fresh Bread

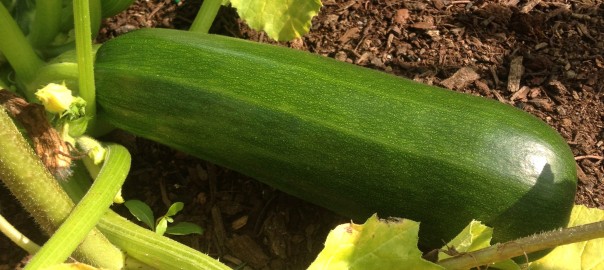
Hi everyone! I’m finally done with my summer class and back in the kitchen making some new recipes! As you might know, zucchini is in season currently. We have a ton growing in our garden, so we had to find use for it all! My goal was to create a healthier-than-normal-but-still-delicious recipe for zucchini bread. This recipe has 3.5 servings of fruits and veggies per batch, and is also full of fiber, protein, and vitamins. Check it out:

Ingredients:

  • 1 ½ cup granulated sugar
  • 1 cup plus 2 tbsp applesauce (I used unsweetened, but you can use sweetened or cinnamon if you have that on hand)
  • 3 eggs
  • 3 tsp vanilla extract
  • 2 cups shredded fresh zucchini
  • ½ cup shredded fresh peeled carrots
  • 1 ½ cup whole wheat flour
  • 1 ½ cup white flour
  • 1 tsp baking soda
  • 4 tsp cinnamon (more or less to taste)

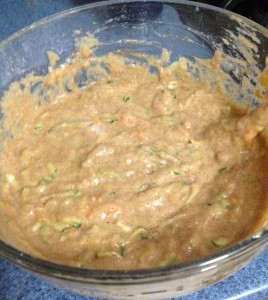
Preheat the oven to 350°F, and grease and flour two 9×5″ loaf pans. Mix the wet ingredients together in a mixing bowl, and then gradually stir in the dry ingredients. Mix until the dry ingredients are fully incorporated into the wet ingredients. It should look like this:

IMG_1581

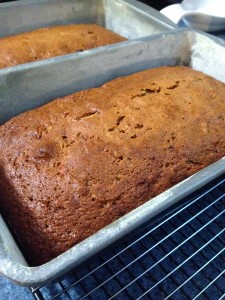
Divide the batter equally into the two loaf pans, and bake for 50 min to an hour, or until a toothpick inserted in the middle of the loaf comes out clean.

IMG_1583


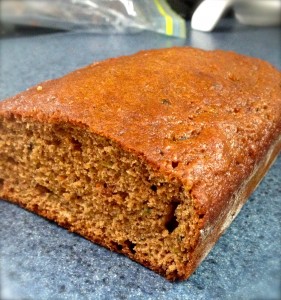
Remove the loaves from the oven and set on a cooling rack until the pans are fully cooled. Then, run a knife along the edge of the loaf and turn the pan upside down so that the loaf falls out onto the cooling rack. Next step: eat it to your heart’s content, knowing full well that you’re getting your daily servings of fruits and veggies from this bread!

IMG_1585


To go along with the zucchini bread, I made a quick batch of sweet tea, which was a brand new adventure for me! This recipe is super simple.

Ingredients:

  • 2 tea bags of your choice (I used Lipton black decaf)
  • 1 quart boiling water from the kettle
  • 1/4 cup granulated sugar, more or less to taste

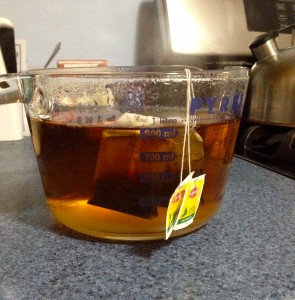
Put the tea bags in a quart container and pour the boiling water over them. Let the tea steep for about 5-7 minutes, and pour the sugar in while the tea is still super hot. Stir the mixture to dissolve the sugar. Then, remove the tea bags and let the tea cool.

IMG_1584


And then, of course, you can enjoy your sweet tea with your favorite straw! Mine just happens to be a color changing one. You can’t go wrong with a fun straw!

IMG_1586


These recipes are so simple, but so yummy! The zucchini bread is perfect for young kids who don’t like to eat fruits and veggies (and everyone else, too!), and the tea is a delicious treat on a hot summer day. I hope you’re all enjoying your summer as much as I am, and I hope you get to try these recipes!

That Food in SoCal, Though…

Hey everyone! I’m back from my vacation in California! I was there for one jam-packed fun-filled week that was perfect for a foodie, and I’d love to share some of my experiences and creations with you!

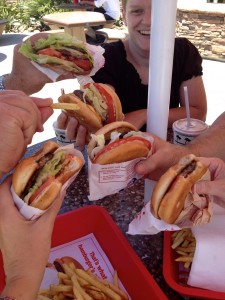
First on the list is a California must-have for all people. No excuses. It’s In-N-Out burger. Simple little burger joint? Anything but! Literally everyone I know who has visited California or lives in California loves In-N-Out. Maybe it’s the burgers, maybe it’s the animal-style fries, maybe it’s the shakes. Whatever it is, they’re doing it right. Their burgers are juicy, the buns are toasted, the toppings are fresh, the fries are crispy and perfectly salted, and the shakes are thick and creamy. PLUS they can wrap your burger in lettuce instead of a bun if you want. This place rocks!

IMG_1319IMG_1320

Then, we went to a little restaurant called Mama Cozza’s. Let’s just say Guy Fieri from the Food Network visited twice for his show Diners, Drive-ins, and Dives and loved it both times. Yeah, it’s that good. And I got to meet the original owner! To start you off, they give you little crunchy breadsticks and a veggie platter, and then they bring out your (probably huge) meal. Mine came with soup and a salad, just in case I was feeling peckish after my whole meal and a side of pasta. Then, they finish you off with a shot of anisette, which is a licorice flavored liqueur.

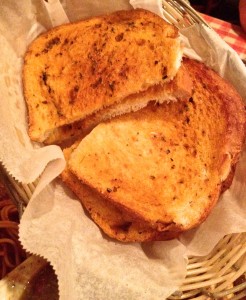
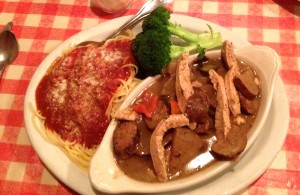
Story time: I’m a wimp when it comes to spicy food, and Guy Fieri is not. And when I saw the menu items he had recommended, I forgot that they’d probably be spicy. So of course I ordered the spiciest thing on the menu- sausage, potatoes, and chicken in a jalapeño sausage gravy. Delicious, but I could only take about 4 bites. And then when I tried to eat the leftovers, the spice had, let’s say, matured. My lips were on FIRE! However, it was worth it. The food is absolutely delicious, and their bread is to die for! Below are pictures of Guy Fieri’s visit, the bread, my dish, and the original owner and his wife with their newborn son (the current owner).

IMG_1323 IMG_1329IMG_1328IMG_1330


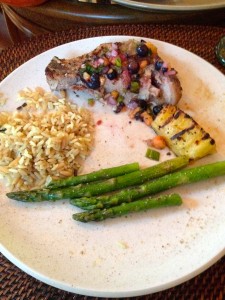
Now came my time in the kitchen. My aunt, who I was with, is a great cook and loves trying new recipes. This one was a pork chop with a blueberry-peach salsa. For sides, we made wild rice pilaf, grilled pineapple, and roasted asparagus. YUM!

If I remember correctly, the salsa had blueberries, peaches, lime juice, basil, shallots, scallions, and olive oil. It was delicious just by itself! But then put over the tender pork chops, it was incredible.

IMG_1355

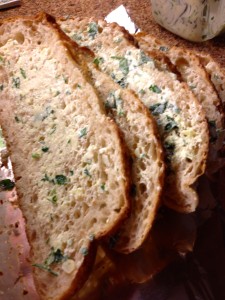
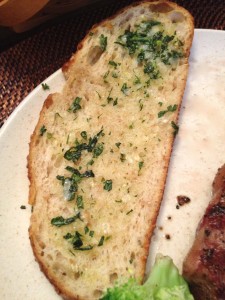
Our next dish was grilled rib-eye steak with Montreal seasoning, garlic Parmesan bread, and steamed broccoli. The bread was my personal creation, so I’ll share the recipe with you!

Ingredients:

  • Sourdough wheat bread, sliced (Or just plain sourdough bread)
  • 1 stick softened butter or margarine
  • 3 cloves fresh minced garlic
  • Parmesan cheese to taste
  • 4 Tbsp minced fresh flat-leaf parsley (my aunt had this in her garden, so I used it, but it’s not entirely necessary if you don’t have it)

Mix the butter, garlic, Parmesan, and parsley together in a small mixing bowl. Spread the butter mixture in a thin layer on both sides of every slice of bread. Then, right before dinner, set your oven to broil and put the slices of bread on a cookie sheet. Put the cookie sheet right under the broiler, and just let the bread toast until it’s golden brown and crunchy.

This bread has a terrific savory flavor, and goes great with any dinner. We had it with our lasagna the next night, and it was just as good as with the steak!

IMG_1432IMG_1434


The final stop was at Catalina Island, where I got a good old fashioned corn dog. While this isn’t anything of culinary genius, I just love a good corn dog!

IMG_1451

Our food along this trip obviously wasn’t the main part of our vacation (although it was a fantastic part!). What really mattered was that we all were together and enjoyed each other’s company, and got to do a ton of fun things together! I hope you all get to have as much fun with your families as I did with mine.

IMG_1393


The Red, White, and Blue Goods

Hi friends! I’m hoping everyone’s Fourth of July weekend was absolutely enjoyable. I know mine was! I spent mine with friends and family and went to the Boston Pops and Fireworks Spectacular, as well as a Boston Red Sox game! I also did a bit of baking, with a patriotic theme to it.

First off, I made a “red, white, and blue parfait” for a dessert when our friends came for dinner. Here’s how it works:

Ingredients:

  • 1 box instant vanilla pudding (I used the box that makes 6, 1/2 cup servings)
  • 1 quart strawberries, cut up
  • 1 pint blueberries
  • Whipped cream (optional)

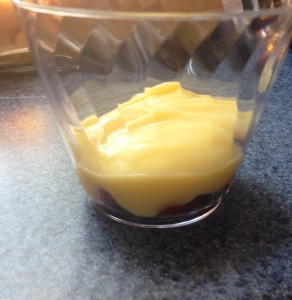
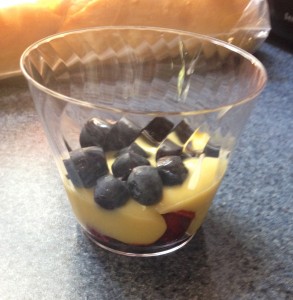
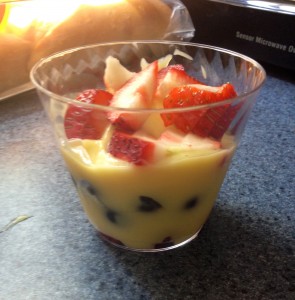
Put a layer of chopped strawberries in the bottom of a parfait cup (or in my case, a plastic Chinet tumbler!). Put a dollop of pudding over that, and then a layer of blueberries on the pudding. Put a last layer of pudding over the blueberries, and then add a few chopped strawberries for garnish. Top with whipped cream right before serving.

IMG_1254IMG_1255

IMG_1257IMG_1259


My other creation was inspired by the All-American summer food: hamburgers! It’s a super simple sweet take on the best cookout food around.

Ingredients:

  • Reduced-fat Nilla wafers
  • York Peppermint Patties

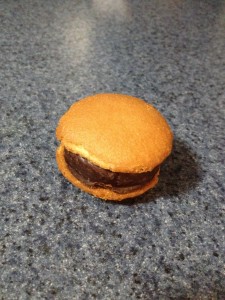
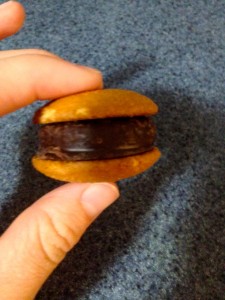
All you do is take two Nilla wafers, and put a Peppermint Patty between the cookies to make a cookie sandwich. The resemblance to a burger is uncanny.

IMG_1290 IMG_1291


Confession: I tried making these little sandwiches with bacon on top, just to see if bacon really goes with anything. Let me tell you, it doesn’t. My adventurous boyfriend and I gave it a try, and while it didn’t really gross us out, you couldn’t even taste the bacon, and it gave the sandwiches a weird flavor.

Here we are trying it with bacon:

IMG_1295


I guess it turns out bacon doesn’t quite go with everything. It just goes with everything but these little burgers!

These sweet treats are so easy and yummy! Definitely give them a try, because they’re so simple that they only take about a minute each to make.

And for your viewing pleasure, here are some pictures of the Boston fireworks:

IMG_1281 IMG_1282 IMG_1284 IMG_1285 IMG_1286 IMG_1288 IMG_1289


I hope you all enjoyed your Fourth as much as I did, and I hope you continue to enjoy your summers! Just remember, it doesn’t need to be a holiday weekend for you to spend time with friends and family. Make it as often as possible!

Peanut Chicken- Without a Wok!

Here I am again! Honestly, after my last recipe about the Oreo ball cookies, I’m not sure I need to continue blogging. Everyone just keeps asking me to make those cookies! But man cannot live on Oreo ball cookies alone- so here’s my peanut chicken recipe! Maybe I’m alone in this, but I am lacking a wok in my kitchen, so this recipe is for those who also lack one!

Here are the ingredients:

  • 1 tbsp vegetable oil or peanut oil
  • 1 pound boneless, skinless chicken breast, cut into bite sized pieces
  • 1 bag sugar snap peas
  • 1 red bell pepper
  • 1 can of sliced water chestnuts
  • 1 1/2 cups chicken broth (I used chicken bouillon cubes for convenience)
  • 2 tsp soy sauce
  • 1 clove minced garlic
  • 1/4 tsp ground cayenne pepper
  • 1 inch ginger root, peeled and chopped
  • 1 tbsp cornstarch
  • 1 cup scallions, chopped
  • Fresh cilantro to taste (I used about a cup of chopped leaves)
  • 2 cups dry, roasted peanuts
  • Dried wonton noodles (optional)

Two hints: For the ginger, use a knife to peel it instead of a veggie peeler. When you’re done with the ginger piece, put the rest in the freezer to preserve its freshness for longer. For shelling the peanuts, I tried Alton Brown’s salad spinner method (see my Homemade Peanut Butter recipe) and it worked really well! It definitely saves time and angst.

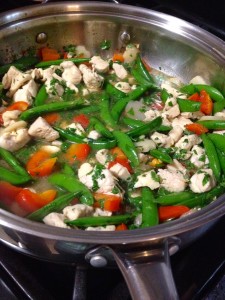
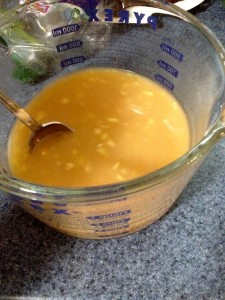
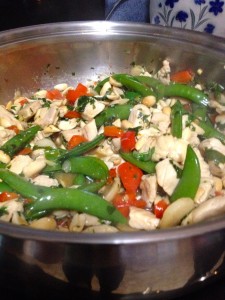
Start by cooking the chicken in a large skillet in the vegetable oil. It’s best if your skillet has high sides to prevent splashing, but if you don’t have one that’s fine! Also add the peas and the bell pepper to the chicken, and let them soften. While the chicken is cooking, mix up the broth, soy sauce, ginger, garlic, sugar, cayenne, and cornstarch. This will be the sauce for the chicken.

IMG_1155IMG_1154


When the chicken is done cooking, pour the sauce over it. Also put the water chestnuts and most of the scallions and cilantro in the skillet, saving some for a garnish. Let the sauce reduce over high heat for about 5 minutes, or longer depending on how thick you want the sauce to be.

IMG_1155


When the sauce has thickened slightly, add the peanuts in and mix until the peanuts are coated. Then, serve over white jasmine rice and garnish with the remaining cilantro, scallions, and dried noodles!

IMG_1157IMG_1158


This recipe was just a whim because I had left over peanuts from making my homemade peanut butter, but it turned out to be a solid recipe for my collection. It’s a very light, tasty dish that’s full of vegetables and protein, and also full of flavor. The savory chicken broth and soy sauce glaze has incredible depth of flavor, and the vegetables and peanuts add a satisfying crunch and earthiness to the dish. And of course, who can resist the dried wonton noodles- they’re as addictive as potato chips! Happy cooking!
Oreo Balls… in Cookies!
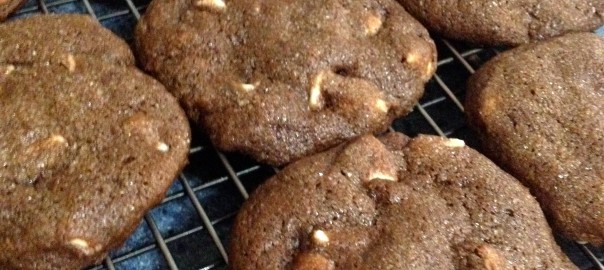
Hi friends! I’m back at the baking, and decided to create a new cookie! For those of you who have eaten Oreo balls before, it’s a spin off of that. For those who haven’t experienced the Oreo ball delights, imagine this: soft Oreo filling, stuffed in a chocolate cookie with white chocolate chips in just the right places!
Is your mouth watering yet? Here’s the recipe! 

Ingredients:

Oreo Filling

  • 1 package Reduced Fat Oreo’s
  • 8 oz. reduced fat cream cheese, softened to room temperature

You can use regular Oreo’s or cream cheese, but I was trying to keep the calorie and fat count down. Plus, the less fat there is in the filling, the less likely it is to melt in the oven! 

Chocolate Cookie

  • 2 cups flour
  • 2/3 cup cocoa powder (unsweetened)
  • 1 tsp baking soda
  • 1/2 tsp salt
  • 1 cup margarine
  • 2/3 cup granulated sugar
  • 2/3 cup brown sugar
  • 1 tsp vanilla extract
  • 2 eggs
  • 1 package white chocolate chips (optional, but definitely recommended)

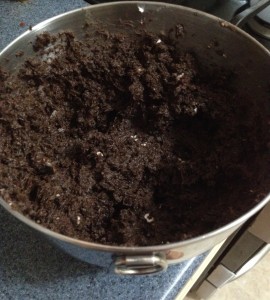
First, make the Oreo filling. It’s super easy! Just crush up the whole package of Oreo’s in a plastic bag, and pour them into a mixing bowl. Then, put the cream cheese in the bowl with the crushed Oreo’s. Using a hand mixer, combine the cream cheese and Oreo’s until it’s dark brown and thoroughly mixed. Set it aside. Here’s what it should look like: IMG_1133


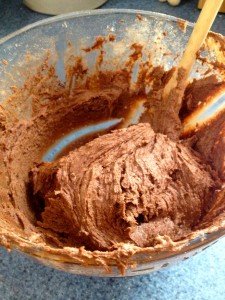
Now it’s time for the cookie dough! Start by softening the margarine. When it’s softened, add the brown sugar and the granulated sugar, and mix until the butter is creamed and fully combined with the sugar. Add the eggs and mix. Add the vanilla extract and stir to combine. Then add the flour, baking soda, cocoa, and salt and mix well until everything is completely mixed. Before adding the white chocolate, this is what it should look like.

IMG_1134


Fold in the white chocolate chips. If you feel like doing a quality check, feel free to take a spoonful of the dough and taste it! I definitely did!

Now comes the exciting part: assembling the stuffed cookies! There were three different methods I tested, and all had completely different results. I’ll list them here according to the result, and you can decide which one you’d rather use.

Mounded, Thick Cookies with Chunks of Oreo

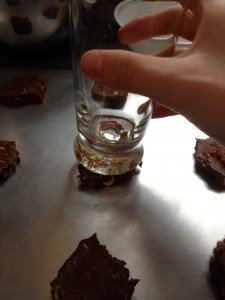
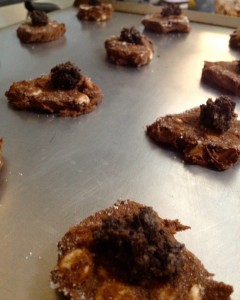
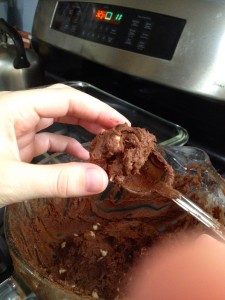
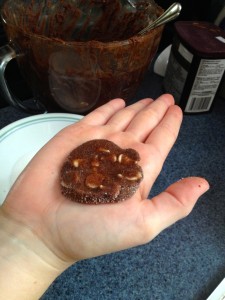
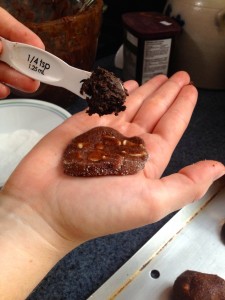
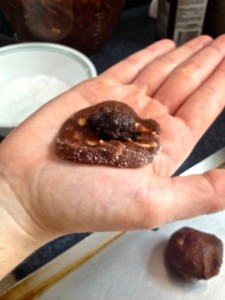
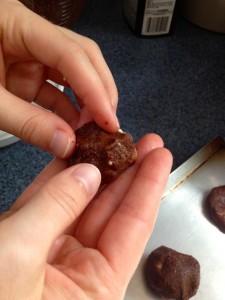
To get these types of cookies, take a spoonful of dough and lay it on a baking sheet. Then, using the bottom of a drinking glass dipped in granulated sugar, press the cookie flat. Put a 1/4 tsp of Oreo filling in the middle of the dough patty, and then pile more dough on top of the Oreo filling. Gently fold the edges of the bottom patty up so that the Oreo filling is enclosed. The process is depicted below:

IMG_1137

IMG_1136


IMG_1138

IMG_1140

Very Flat, Soft Cookies with Oreo Throughout

This process is almost like making stuffed sugar cookies, and it’s really simple! It’s easier than the first method, in my opinion, but you can choose what you wish! First, take a spoonful of cookie dough and roll it in a bowl of granulated sugar. Then, press it flat in your palms. Take a 1/4 tsp of Oreo filling and put it in the middle of the patty. Then, fold the dough around the Oreo filling and roll it into a ball again. Place it on the baking sheet, and with a sugared drinking glass, press it flat.

IMG_1141IMG_1142IMG_1143IMG_1144IMG_1145IMG_1147IMG_1150IMG_1137


Thick, Soft Cookies with Oreo Throughout

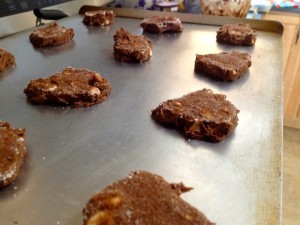
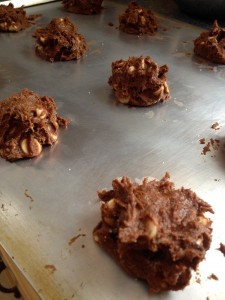
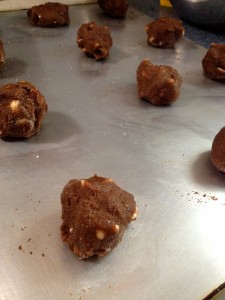
These were my personal favorites, and also won the prize among my test subjects! This is the easiest method, and in my opinion yields the best cookie. Do the same method as listed above, but don’t press it flat with a glass; just leave it in a ball on the baking sheet. This is how they looked:

IMG_1149

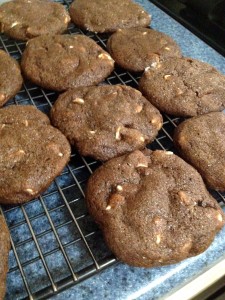
After you’ve chosen your favorite method, put the cookies in a 325ºF oven for 12 minutes (after 6 minutes, switch the baking sheets to the other rack in the oven). Make sure to enjoy some right after they come out of the oven- they’re soooo yummy warm!

Since I couldn’t eat all of these myself, I made up little plates of them and gave them away. I had extra Oreo filling left over, so I made regular Oreo balls! That’s another super easy recipe: just take a scoop of Oreo ball filling, and roll it in melted white chocolate and drizzle milk chocolate on top.

IMG_1166


These cookies were so yummy, my friends couldn’t stop eating them! They also made a great little gift in the small plates. If you’re in the mood for chocolate, go ahead and try this recipe! You won’t be disappointed!

Game Days and Gardens

Well, it seems that Spring has finally arrived! That’s pretty indicative of the fact that football tailgating parties are out of season, but I figure, it’s Game Day somewhere! Today’s post will be a mix of a few yummy tailgating recipes, and then a healthier, fresher twist on one recipe that uses yummy veggies from spring and summer harvests!

The first recipe on the list for Game Day parties is for honey mustard chicken wings.

Ingredients:

  • 3 lbs chicken wings (the little drumettes work well for this recipe)
  • Salt and pepper to taste
  • 1 tbsp butter or margarine
  • 1/4 cup dijon mustard
  • 1/4 cup honey (you can also just buy honey Dijon mustard instead of mixing them yourself, and that tastes great! Just use 1/2 cup.)

Preheat the oven to 400ºF. Line a baking sheet with foil and place a wire rack on top of it (if you’re planning on using a cooling rack for this, make sure the rack is oven-safe first!). Salt and pepper the wings liberally and then line them up on the wire rack. Bake them until they’re golden brown, around 45 minutes. You can also grill the wings.

While they’re baking, melt the butter in a saucepan and whisk in the honey and mustard. When the wings come out of the oven (or off the grill), brush the sauce onto them until they’re evenly coated. Then, put them back in the oven/grill for around 10 minutes, and they’re ready to be enjoyed! If you’re grilling the wings, make sure you still have some sort of pan under the wings, or else the sauce will drip into the coals and could cause flare-ups or spitting.

You can also use boneless chicken strips, if you don’t feel like getting sauce on you from the wings!

IMG_0784

Next up, the recipe is twice-baked potatoes.

Ingredients:

  • Large golden potatoes (or any potato that you’d like to bake); one potato makes two servings, so plan accordingly if your guests will want one or two servings.
  • Salt and pepper to taste
  • Whatever toppings you’d like; I used broccoli and cheese for our party, but you can also use bacon, sour cream, chives, chicken, etc.

Bake the potatoes either in the oven at 400ºF for around an hour and 15 minutes, or in the microwave on high heat for about 10 minutes. When baking the potatoes, make sure you poke numerous holes in them with a fork first, so that they don’t explode. You can also grill them, wrapped in foil, and take them off the grill when they’re fork tender.

When the potatoes are baked, cut them in half length-wise (they’re screaming hot, so be careful!). Then, scoop out about 2/3 of the soft insides and put the insides into a bowl. Mash them with whatever toppings you want and a little milk or sour cream, and then pile the mixture back into the potato skin. It won’t fit perfectly because there are more ingredients, so just pile them high! Put them back in the oven for around 10-15 minutes until they’re heated through and all the cheese is melted. If you’re using a grill, just put them on until everything is hot and melty, about 10 minutes. Enjoy!

The final party recipe is for a simple fruit dip. It’s short and sweet, but adds a great touch to any fruit salad or fruit platter!

Ingredients:

  • 1 cup vanilla Greek yogurt
  • 2 tbsp brown sugar, more or less to taste

Mix these all up, and adjust the brown sugar amount or add a dash of vanilla extract in to taste, and you’re good to go! You can pour it over fruit slices or have it in a bowl for dipping. It stores very well in the fridge, too.

Now for the healthier twist on the honey mustard chicken: stir-fry!

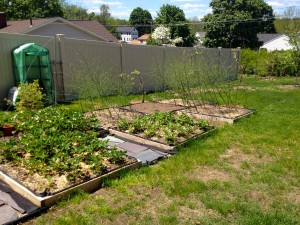
My dad is super big on gardening, and has transformed our yard into a mini produce market. We have all sorts of vegetable plants and fruit trees, and love taking advantage of the fresh produce. It’s so good for you, and really makes a difference in the taste!

IMG_1111

IMG_1109


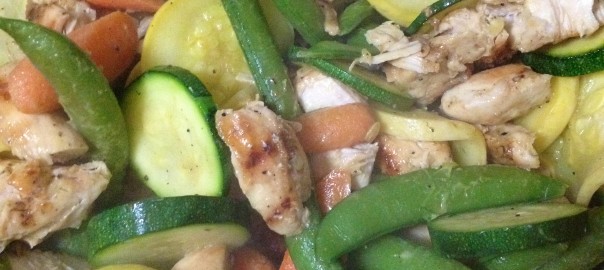
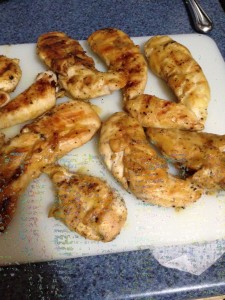
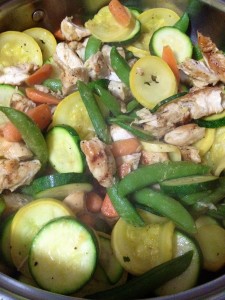
Today’s recipe includes honey mustard chicken, sugar snap peas, summer squash, carrots, and zucchini, all from our garden (well, not the chicken). You can either use leftover chicken from the chicken wings and pull it from the bones, or buy boneless strips, grill them, and coat them in sauce. You don’t have to put them back on the grill, because you’ll be sautéing the chicken with veggies and you want the sauce to get on the veggies!

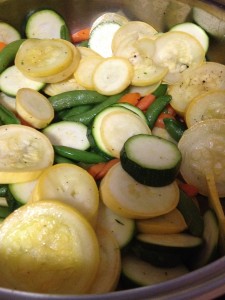
This recipe is really simple: just chop the vegetables and either pull the chicken from the bones or quickly grill it. Then, put a little olive oil into a sauté pan and let it heat. Put the carrots in first and let them soften a bit, then the peas, then the squash and zucchini.

Tip: when cooking vegetables in a pan, always put the hardest ones in first, because if you put them all in together, the softer vegetables will be burned mush by the time the harder ones are done.

When the vegetables are soft, add the chicken and heat it, mixing everything around so that the sauce gets on the other vegetables. When the chicken is hot, turn off the heat and serve the stir-fry!

IMG_0785 IMG_0786


A few variations on this stir-fry recipe could be with balsamic vinaigrette and dried cranberries, or a Thai version using the peanut butter from my previous post and scallions. Does that sound yummy, or what?

Game Day parties are a great way to bring people together to enjoy some great community, as well as some rockin’ food. And gardens, well, the benefits are endless! Fresh food, great taste, and a chance for the whole family to get their hands dirty together. I hope these recipes give you some great ideas and tips for your next party or summer dinner!

Peanut Butter, the Natural Way!

So how many people like PB&J’s? Actually, I really don’t. But my roommate is a peanut butter fanatic! Recently I went to the Mennonite Relief Sale in Pennsylvania,  where there was a stand selling homemade peanut butter, and I bought some for her to try. It was delicious! I figured I would try my hand at it, and came up with this recipe. It’s seriously the easiest thing ever, and takes a grand total of 5 minutes. It’s also gluten-free, dairy-free, low-sodium, and FULL of omega-6 fatty acids, as well as super inexpensive (like $1.99 for the whole recipe kind of inexpensive).

Ingredients:

  • Peanuts- I’ve left this open-ended, because they can be roasted or raw, flavored or not, salted or unsalted, and it all ends up tasting great. I used a 12 oz. bag of unshelled, roasted, unsalted peanuts.
  • ~1 tsp oil, unflavored or with a complementing flavor. I used vegetable oil, but you can use coconut, peanut, sunflower, etc.
  • ~1 tsp honey, to taste
  • 1/4 cup sugar, more or less to taste
  • 1/3-1/2 tsp salt, to taste

First, if you bought unshelled peanuts, you’ll have to shell them by cracking open the skins and pulling out the peanuts. This part can be slightly tedious, but I turned on Frozen while I was doing it and that made any potential frustration go away!

One shelling technique that I’ve read is from Food Network Chef Alton Brown: get out a salad spinner and rub the peanuts between your hands over the spinner until the shells come loose and break. Once all the shells and peanuts are separated, close the spinner and just spin it until all the shell fragments are on the outside and the peanuts are still on the inside!

When you’re shelling the peanuts, it’s ok if the little red skins stay on the peanuts, but I took most of them off. If you bought raw peanuts and want to roast them, you can roast them in the shell at 350ºF for 30 minutes, and then shell them.

IMG_1069

Then, after the peanuts are shelled and ready to go, put them in a food processor or blender (preferably food processor, though) and grind them up. At first they’ll turn into peanut dust, and then get clumpy (this is after about 2 minutes of processing). At this point, you can add the oil to loosen it up a bit, as well as any other flavorings such as honey, cayenne, cinnamon, black pepper, etc.

Keep grinding the peanuts for a couple minutes, until they become loose and look like peanut butter. Add in the sugar and salt and give it one final spin for just a few seconds to combine everything.

Now you’re ready to eat it or store it! Just a heads-up: the peanut butter will be warm, so don’t be surprised by that! It can be a bit disconcerting if you’re used to room temperature peanut butter. It’s also a little looser than store-bought peanut butter, but you can make it thicker by not processing it as much and leaving it chunkier. Also, if you still like whole peanut fragments in your peanut butter, you can reserve some peanuts for the very end and stir them in by hand.

IMG_1070


Maybe this is the peanut butter that will make me enjoy PB&J’s! This peanut butter can be used in any recipe, from peanut butter cookies to a Thai peanut sauce. You can also jazz it up however you want by adding different spices and oils. And finally, you can make it using other nuts or adding cocoa powder to it (can you say homemade Nutella?!). The sky is the limit here, so be creative and enjoy!