Category Archives: Lunch and Dinner

Breakfast Burrito Hors d’oeuvres

Hi, friends! Sorry that it’s been a while since my last post. I just started working as a dietetic intern, and it takes up quite a bit of my time! Luckily, as a dietetic intern, I get to focus on food during the day- so this next recipe is actually an invention from work that happens to be delicious and super wicked easy to make!

This recipe is for egg and guacamole pinwheels, which are wonderful for breakfast because they’re packed with protein, low in carbs, and contain healthy fats. They’re also great for party platters, and happen to go hand in hand with a great salsa. What could be better???

Ingredients:

  • 1 egg, scrambled
  • 3 tbsp guacamole (I’ll include the recipe for my guacamole at the bottom of this post)
  • 1 soft taco tortilla (you can use a regular white tortilla, or you can use Olé Xtreme Wellness, Joseph’s, or FlatOut brands for higher fiber/protein and lower carb options)

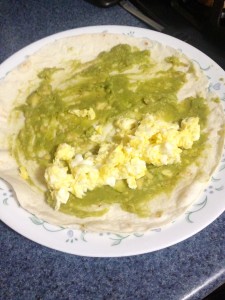
Spread the guacamole in a thin layer over the tortilla. Then, arrange the scrambled egg in a line along the side of the tortilla.

IMG_2710

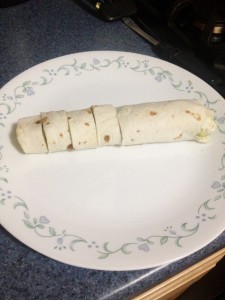
Roll the edge of the tortilla nearest the egg up and over the egg, and then continue rolling. This will ensure that the egg is in the center of the wrap, and that the guacamole holds the tortilla roll together (kind of like sushi- you have your protein in the middle, and then the stuff on the outside holds it all together).

IMG_2711

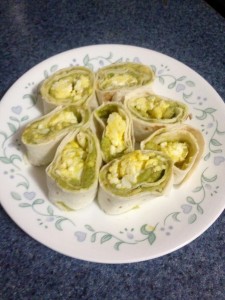
Gently cut the roll into 1-inch pieces using a serrated knife. You can either eat them now, or arrange the pieces on a plate with some salsa and serve them at a party!

IMG_2712

IMG_2716

And there you have it! Super easy and absolutely delicious! Now, for those who want to make their own guacamole and don’t have a great recipe…

Ruth’s Guacamole:

  • 1 avocado, mashed
  • 1 tsp lime juice
  • Garlic salt to taste
  • Chili powder to taste
  • Cracked black pepper to taste

Mix all of the ingredients together, and you have a great guacamole! Happy cooking!
Not Your Average Hashbrowns

Hello, friends! Happy Monday! I’ve been visiting my fiancé in Oklahoma this week, and decided to treat him to a special dinner with his grandparents. I have a fantastic recipe to share today from that dinner, given to me by his mother- Potato Casserole! Perhaps not the most glamorous name, but there you have it. I’ll tell you now, this recipe isn’t low-fat, low-sodium, or really low-anything. However! It is high-delicious, high-crowd-pleaser, and high-easy-to-make.

Ingredients:

  • 2 lb. frozen hashbrowns, thawed
  • 1 stick melted butter or margarine
  • 1 cup cream of chicken soup (you can use low-sodium)
  • 8 oz sour cream (you can use low-fat)
  • 1/2 cup chopped yellow onion
  • 2 cups shredded sharp cheddar cheese
  • 1 tsp salt (I didn’t put this in)
  • 1 tsp pepper (I didn’t put this in either)
  • 2 cups crushed corn flakes
  • 1/2 stick melted butter or margarine

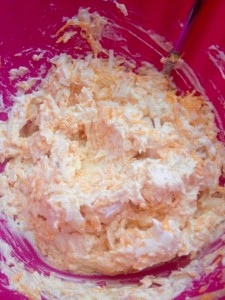
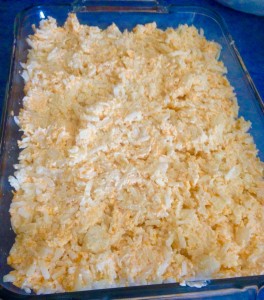
Preheat the oven to 350ºF. Combine all but the last two ingredients in a large mixing bowl. IMG_2594

Spoon the mixture into a large glass casserole dish. The one I used was pretty huge, like 15″x10″. If you have a 9×13″, that will definitely work- you just may have to cook it for a few minutes longer!

IMG_2595

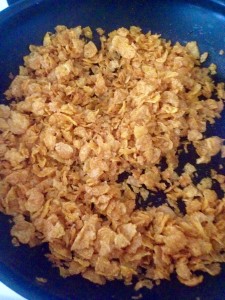
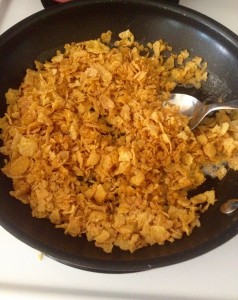
Sauté the corn flakes in the 1/4 cup butter, just until they’re darker brown but still crunchy.

IMG_2597IMG_2596

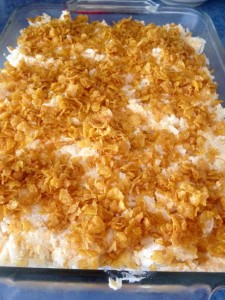
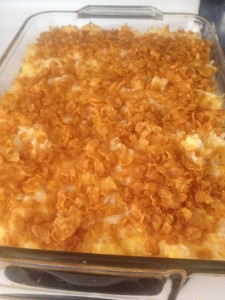
Sprinkle the corn flakes over the top of the casserole so that it’s evenly coated.

IMG_2598

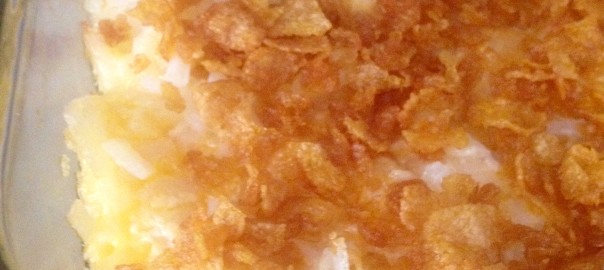
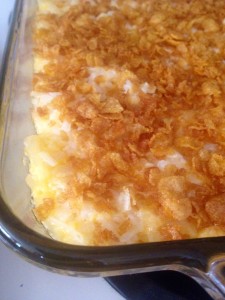
Bake the casserole, covered with aluminum foil, for 40 minutes to 1 hour. I baked mine for 45 minutes and it was absolutely perfect. I’m talking bubbly cheese, crunchy topping, creamy potatoes… it seriously doesn’t get better than that. I have a picture of a yummy cheesy corner of the casserole, just so you can get an idea for how good this looks.

IMG_2600IMG_2599

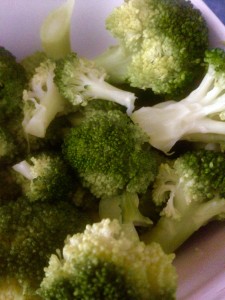
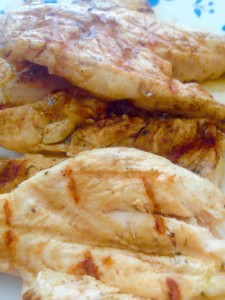
And there you have it! I served this with marinated chicken breast (olive oil, salt, pepper, minced garlic, chopped onion, lemon juice, cilantro- put it all in a Ziploc bag with the chicken and leave it in the fridge for about 2 hours, then grill it), steamed broccoli, and crescent rolls. We had quite the spread!

IMG_2604 IMG_2602 IMG_2601 IMG_2599

We were quite full afterwards, and were also quite happy. I hope you enjoy this fantastic recipe, and give it a try! Happy cooking!


Springtime at Last!

Hi everyone! I don’t want to jinx it, but it seems like Spring might finally be upon us! The warm weather rekindled our itch to get outside and grill, and so that’s what this post is all about! My dad got a new grill with a rotisserie for his birthday, so we had rotisserie chicken, and spice-grilled vegetables that were my responsibility. Here are the spices and other ingredients you’ll need for the veggies:

  • Garlic powder
  • Chili powder
  • Ground mustard
  • Fresh lemon juice
  • Salt
  • Black pepper

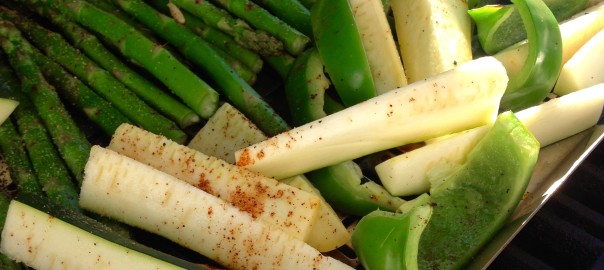
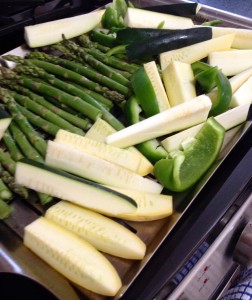
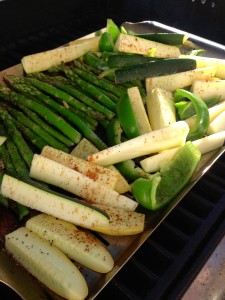
The veggies I used were zucchini, summer squash, asparagus, and green peppers. I cut the zucchini and squash into spears, the green pepper into wedges, and just cut the woody ends off of the asparagus. Arrange them on a baking sheet or a grilling pan.

IMG_2390

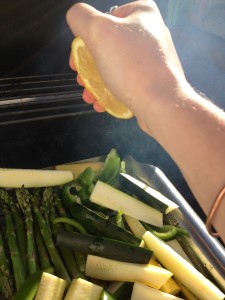
Squeeze lemons over the vegetables until they’re thoroughly coated to your liking.

IMG_2392

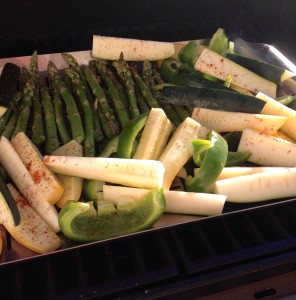
Now, sprinkle the spices over the vegetables in whatever quantities you choose! I used a few tablespoons of chili powder and garlic powder, and a very small amount (maybe a teaspoon) of the ground mustard. Then, sprinkle salt and pepper generously over all the vegetables.

IMG_2393 IMG_2397

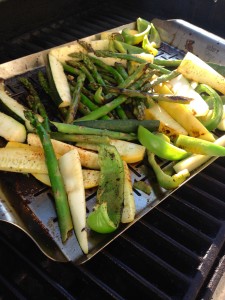
Put the pan in the grill at 350ºF, for about 10 minutes. You can turn the vegetables on the pan to get them browned all over, or you can just leave them. We tossed them at the very end, because we just wanted to get them softened and a bit browned.

IMG_2398

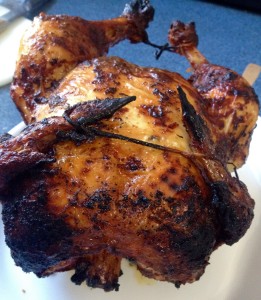
And now, just to show you how well the rotisserie worked, here’s a picture of the yummy chicken!

IMG_2394

Perfect, right? This was such a great spring meal- we ate like kings and the food was so light and fresh! This may be a simple recipe, but those vegetables were so delicious, and the spices brought out the natural flavor of the veggies. Seriously, you should try it! Happy grilling!

Hosting Tea!

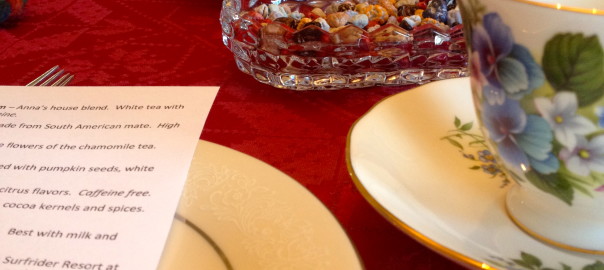
Hi all! Well, the holidays are officially over- time to start creating special occasions and making reasons to have friends over! For my most recent get-together, it was our annual tea party. Usually, our group goes out to a tea house and the daughters treat their mothers to tea. This time, though, we decided to stay in and make the whole thing ourselves! We had a delicious strata, blueberry scones, cream puffs and éclairs, chocolate covered strawberries, chicken salad sandwiches, and different types of cheese. And of course, the teas! We each had our own teapot thanks to the contributions of teapots by all the ladies, so we could all pick our own tea to try. We even used antique teacups!

IMG_2161

IMG_2160

The recipe that I wanted to give you all is the recipe for the chicken salad sandwiches. It is such a simple recipe, but it was absolutely delicious! It’s elegant and traditional, but not so fancy that little kids wouldn’t love it as well! Here are the ingredients:

  • 1 can chopped chicken or one boiled chicken breast (The canned chicken was scary to me at first, but it’s a great shortcut and is actually really nice and moist!)
  • 1/4 cup mayonnaise, light or regular
  • Dried sweetened cranberries to taste (I used about 1/8 cup)
  • Scallions to taste (I used about 1/8 cup)
  • Wheat bread

Drain the water from the chopped chicken, and put it in a mixing bowl. Using two forks, shred the chicken further so that you have very small pieces of chicken. Hint: This will prevent your guests from taking a bite of the sandwich and having a huge chunk of chicken fall out onto their plate. Now add the rest of the ingredients and mix thoroughly. If you want to make tea sandwiches, cut the crusts off 16 pieces of the wheat bread. If you’re just making sandwiches for the family, it’s up to you about the crusts!

Spoon the chicken salad onto the bread to make about eight sandwiches. You might have some chicken salad left over, so either make more sandwiches or eat it from the bowl- it’s great either way! Cut each sandwich into two triangles and arrange them on a plate, and you’re ready to serve!

IMG_2157

I hope you all enjoy this recipe, and remember- you don’t have to be in the holiday season to spend time with friends and family! You can make the time and make the plans, and feel the joy of the holidays year round. Maybe take these sandwiches on a picnic! Whatever you choose, enjoy!


Parmesan Roasted Asparagus

Hello everyone! I hope you all had a wonderful Christmas! I certainly did- the whole day was filled with family, friends, and lots of food. We had a delicious rib roast, broccoli, baked potatoes, and some fantastic asparagus! The asparagus was inspired by a book called The Flavor Bible that my brother gave me for Christmas, and it was so good that I decided you all should get the recipe too. Here are the ingredients:

Ingredients:

  • 1 lb. green asparagus
  • 1/4 cup extra virgin olive oil
  • 1/4 tsp salt
  • 1/4 tsp black pepper
  • 1/2 tsp lemon juice
  • 1/4 cup grated Parmesan cheese

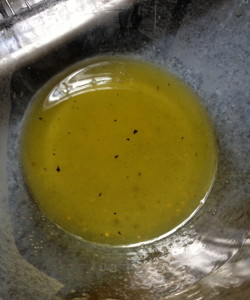
First, preheat the oven to 400ºF. Set a wire rack in a baking sheet that the asparagus can sit on and roast. Then, wash the asparagus and trim the bottoms of the asparagus so that you only get the tender, green part instead of the woody ends. Set the asparagus aside. Now, combine the olive oil, salt, pepper, and lemon juice in a shallow plate or bowl.

IMG_2151

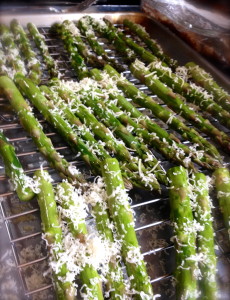
Toss the asparagus in the olive oil marinade and shake the excess marinade off. Arrange the asparagus on the baking sheet rack. Sprinkle the grated Parmesan over the top.

IMG_2153

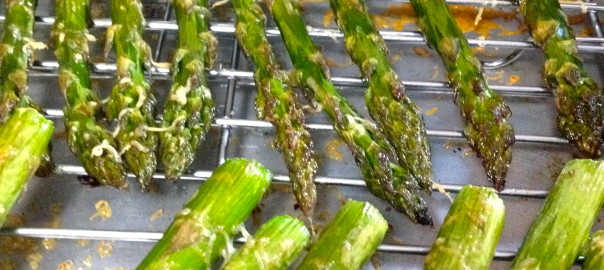
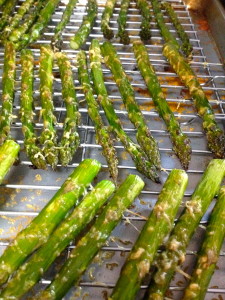
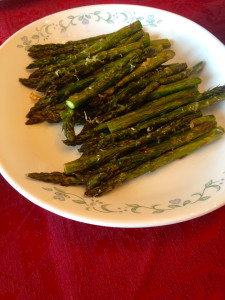
Put them in the oven, and roast them for about 15 minutes.  When they come out, the cheese should be melted and golden and bubbly, and the asparagus will be incredibly tender!

IMG_2154

Now you can either eat them from the rack, or plate them for a family dinner!

IMG_2155

These asparagus were so good! They were the first menu item gone, and we were wishing we had some more.  I would also suggest that you take a look at The Flavor Bible- it’s just a list of foods and different flavors that work well with those foods. Super helpful but still allows you to be creative! I hope you enjoy this recipe, and that you all have a happy New Year!

Peanut Chicken- Without a Wok!

Here I am again! Honestly, after my last recipe about the Oreo ball cookies, I’m not sure I need to continue blogging. Everyone just keeps asking me to make those cookies! But man cannot live on Oreo ball cookies alone- so here’s my peanut chicken recipe! Maybe I’m alone in this, but I am lacking a wok in my kitchen, so this recipe is for those who also lack one!

Here are the ingredients:

  • 1 tbsp vegetable oil or peanut oil
  • 1 pound boneless, skinless chicken breast, cut into bite sized pieces
  • 1 bag sugar snap peas
  • 1 red bell pepper
  • 1 can of sliced water chestnuts
  • 1 1/2 cups chicken broth (I used chicken bouillon cubes for convenience)
  • 2 tsp soy sauce
  • 1 clove minced garlic
  • 1/4 tsp ground cayenne pepper
  • 1 inch ginger root, peeled and chopped
  • 1 tbsp cornstarch
  • 1 cup scallions, chopped
  • Fresh cilantro to taste (I used about a cup of chopped leaves)
  • 2 cups dry, roasted peanuts
  • Dried wonton noodles (optional)

Two hints: For the ginger, use a knife to peel it instead of a veggie peeler. When you’re done with the ginger piece, put the rest in the freezer to preserve its freshness for longer. For shelling the peanuts, I tried Alton Brown’s salad spinner method (see my Homemade Peanut Butter recipe) and it worked really well! It definitely saves time and angst.

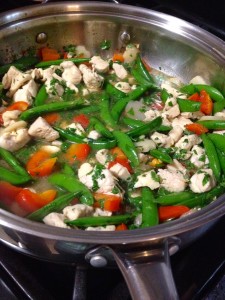
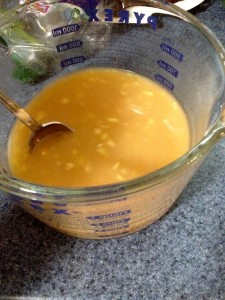
Start by cooking the chicken in a large skillet in the vegetable oil. It’s best if your skillet has high sides to prevent splashing, but if you don’t have one that’s fine! Also add the peas and the bell pepper to the chicken, and let them soften. While the chicken is cooking, mix up the broth, soy sauce, ginger, garlic, sugar, cayenne, and cornstarch. This will be the sauce for the chicken.

IMG_1155IMG_1154


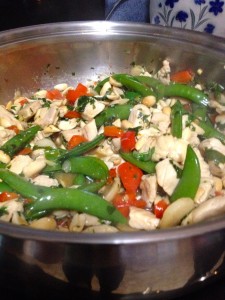
When the chicken is done cooking, pour the sauce over it. Also put the water chestnuts and most of the scallions and cilantro in the skillet, saving some for a garnish. Let the sauce reduce over high heat for about 5 minutes, or longer depending on how thick you want the sauce to be.

IMG_1155


When the sauce has thickened slightly, add the peanuts in and mix until the peanuts are coated. Then, serve over white jasmine rice and garnish with the remaining cilantro, scallions, and dried noodles!

IMG_1157IMG_1158


This recipe was just a whim because I had left over peanuts from making my homemade peanut butter, but it turned out to be a solid recipe for my collection. It’s a very light, tasty dish that’s full of vegetables and protein, and also full of flavor. The savory chicken broth and soy sauce glaze has incredible depth of flavor, and the vegetables and peanuts add a satisfying crunch and earthiness to the dish. And of course, who can resist the dried wonton noodles- they’re as addictive as potato chips! Happy cooking!
Too Busy to Eat?

Hello, all! It feels like forever since my last post- life gets busy at the end of a semester! This post will be fairly short, because I should be working on a project as I type! In the spirit of having no time and needing to eat on the go, I thought I would post some of my favorite sandwich recipes. They’re healthy, delicious, and easy to eat anywhere! In fact, you can prepare some of the ingredients over the weekend, and then have sandwich ingredients on hand all week!
Here are the sandwiches of the day:

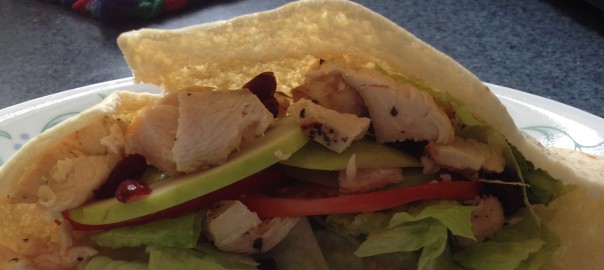
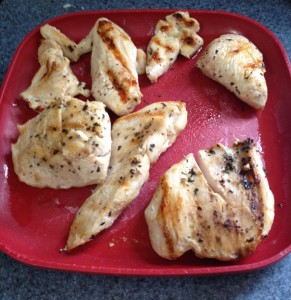
Grilled basil chicken salad with shredded cheese, apple slices, dried cranberries, and shredded lettuce in a pita pocket. 

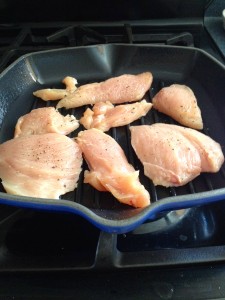
1. Grill boneless chicken tenders, sprinkling with salt, pepper, and dried basil on both sides of the chicken. When the chicken is cooked through, remove it from the heat and let it cool fully before touching it again. (Tip- do this before hand and refrigerate it to save time!)IMG_0972IMG_0975

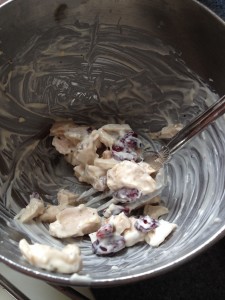
2. When the chicken is fully cooled, cut it into small squares and mix it with a dollop of mayonnaise. Then, add the dried cranberries to the mixture.IMG_0980

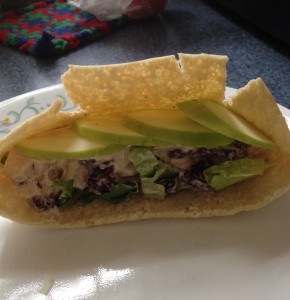
3. Assembly time! Take a half-circle pita pocket and put shredded lettuce and shredded cheese on the bottom of the pita. This will prevent the bottom of the pita from getting soggy, and also adds great crunch. Then, load the chicken salad into the pocket. Finally, thinly slice a green apple and layer the slices on top of the salad for more crunch and tartness. Wrap the sandwich in foil and you’re ready to go!IMG_0982


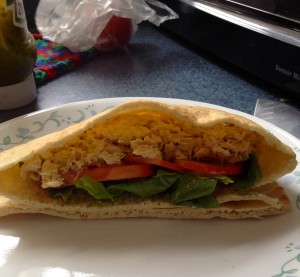
Tuna salad with sliced tomato and lettuce in a pita pocket.

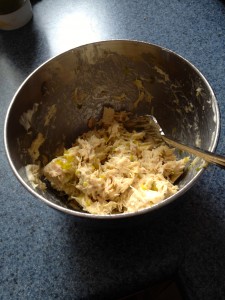
1. Open and drain a can of tuna, and then mix the tuna in a small bowl with a dollop of mayonnaise and a dollop of pickle relish (you can leave the relish out if you don’t like it). IMG_0973

2. Open the pita pocket and put the lettuce leaves on the bottom, to prevent sogginess. (TIP: if you don’t like soggy bread, always put your dry and crunchy ingredients on the bottom of the sandwich. It really does work!) Then, put tomato slices on the lettuce leaves, and then the tuna on top of the tomato. This way, the tomato (the wettest item) is in the middle so there’s the least chance of it leaking all over the bread).

IMG_0974


Italian Sub on a Grinder Roll

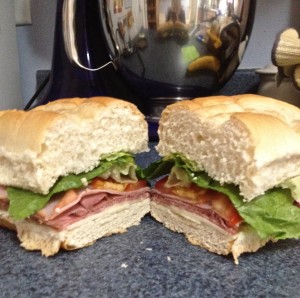
This sandwich really is all about the assembly. The ingredients are simple: roast beef, salami, ham, sliced cheese, lettuce/tomato, and Italian dressing. But in order to make this sandwich last until lunch without getting soggy (can you tell I hate soggy bread?), you have to really think about the layers of the sandwich. Here’s the assembly process:

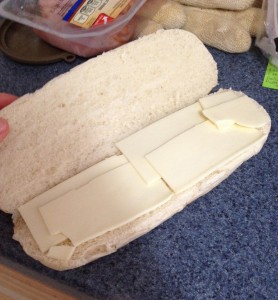
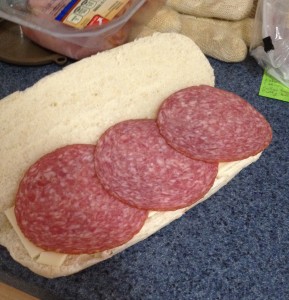
Cut the roll in half length-wise. Then, on the bottom piece of bread, layer American cheese all the way across. Then, the salami. Next comes the ham, and then the roast beef. Now comes the tomato- once again, it goes in the middle to prevent soggy bread! And then the lettuce goes over the tomato. Since an Italian sub includes Italian dressing, put that in a little separate container and either pour it on the sandwich right before eating, or dip the sandwich into it as you’re eating. Here’s the assembly process in pictures:

IMG_0976IMG_0977IMG_0978IMG_0979


You can obviously make your own variations on these sandwiches, too. For example, you can use canola mayo or low-fat mayo, and you can just use plain grilled chicken or tuna instead of making a salad with it. You can also simplify the ingredients, or add your own zip to them! That’s the beauty of sandwiches- they’re so individualized and can be as easy or complex as you desire!

I hope these recipes help make the eating process a little simpler. Never skip a meal because you’re too busy- eating is WAY too satisfying, and also keeps you going throughout the day! Enjoy!